
For questions ask Laurent Itti.
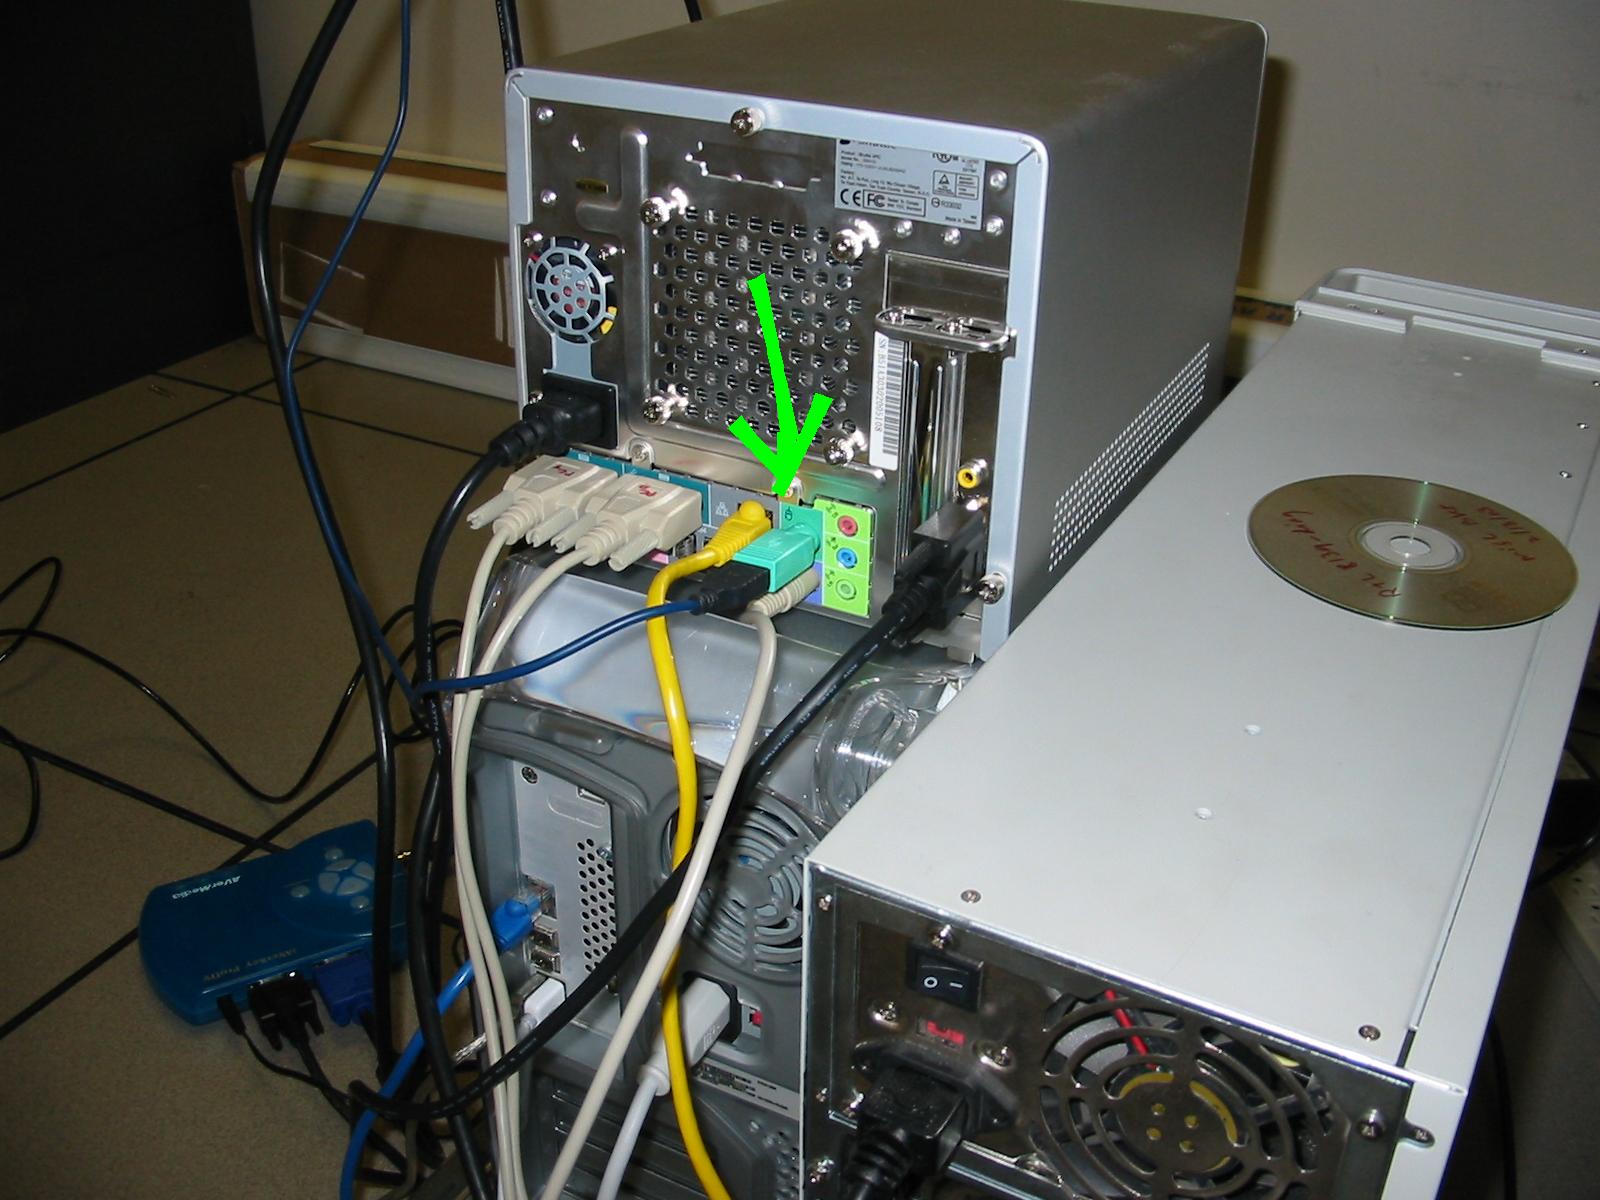 |
First, make sure your stimulus presentation computer is properly setup, hooked up to keyboard and mouse, to the monitor, to the serial communications towards the eye tracker, etc. |
 |
Help your subject find a comfortable position. It is usually a good idea to start seating from the side, then rotate the chair to face the computer screen. |
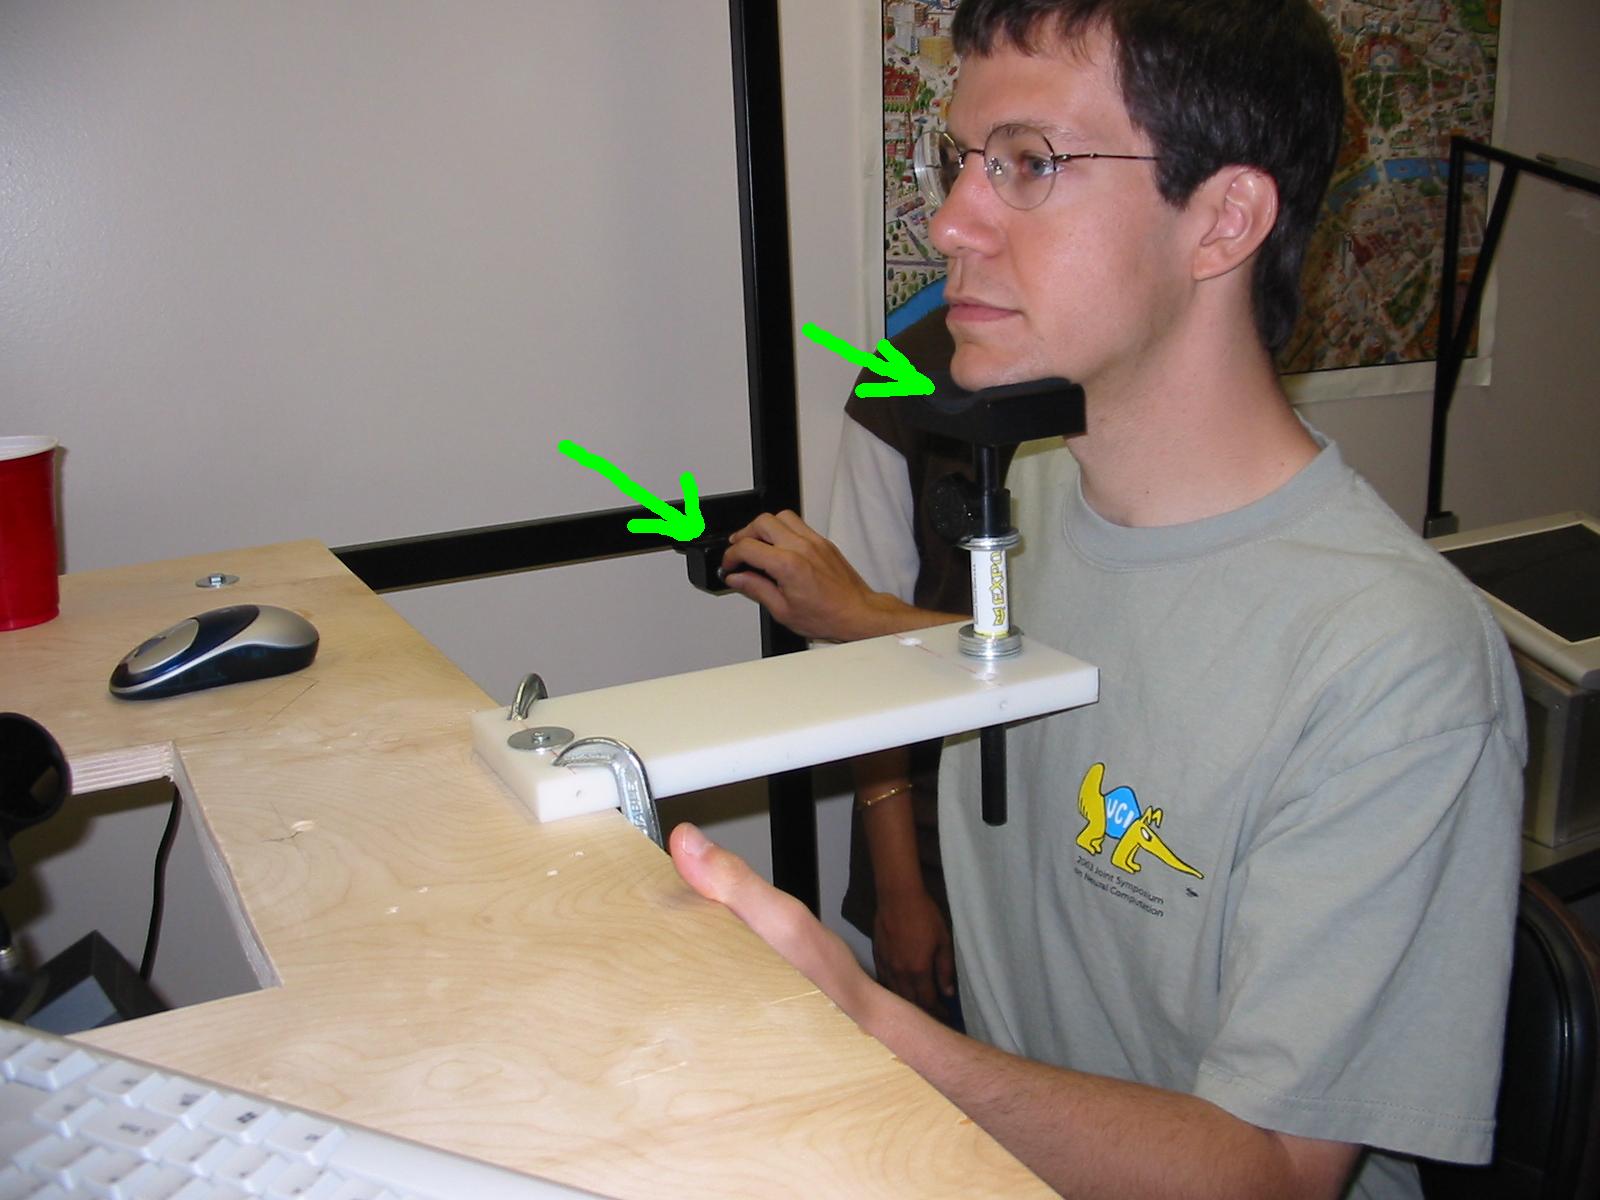 |
Avoid modifying the position and height of the chin-rest; instead, use the electric up/down command switch to adjust the height of the chair. Instruct your subject to play with the setting until a truly comfortable position is achieved. |
 |
Meanwhile, get your stimulus presentation computer ready and your stimulus program ready to start for that particular subject. |
 |
Also meanwhile, connect the infrared light source power cable to the plug on the back of the light source. Don't forget to disconnect it once your session is over! |
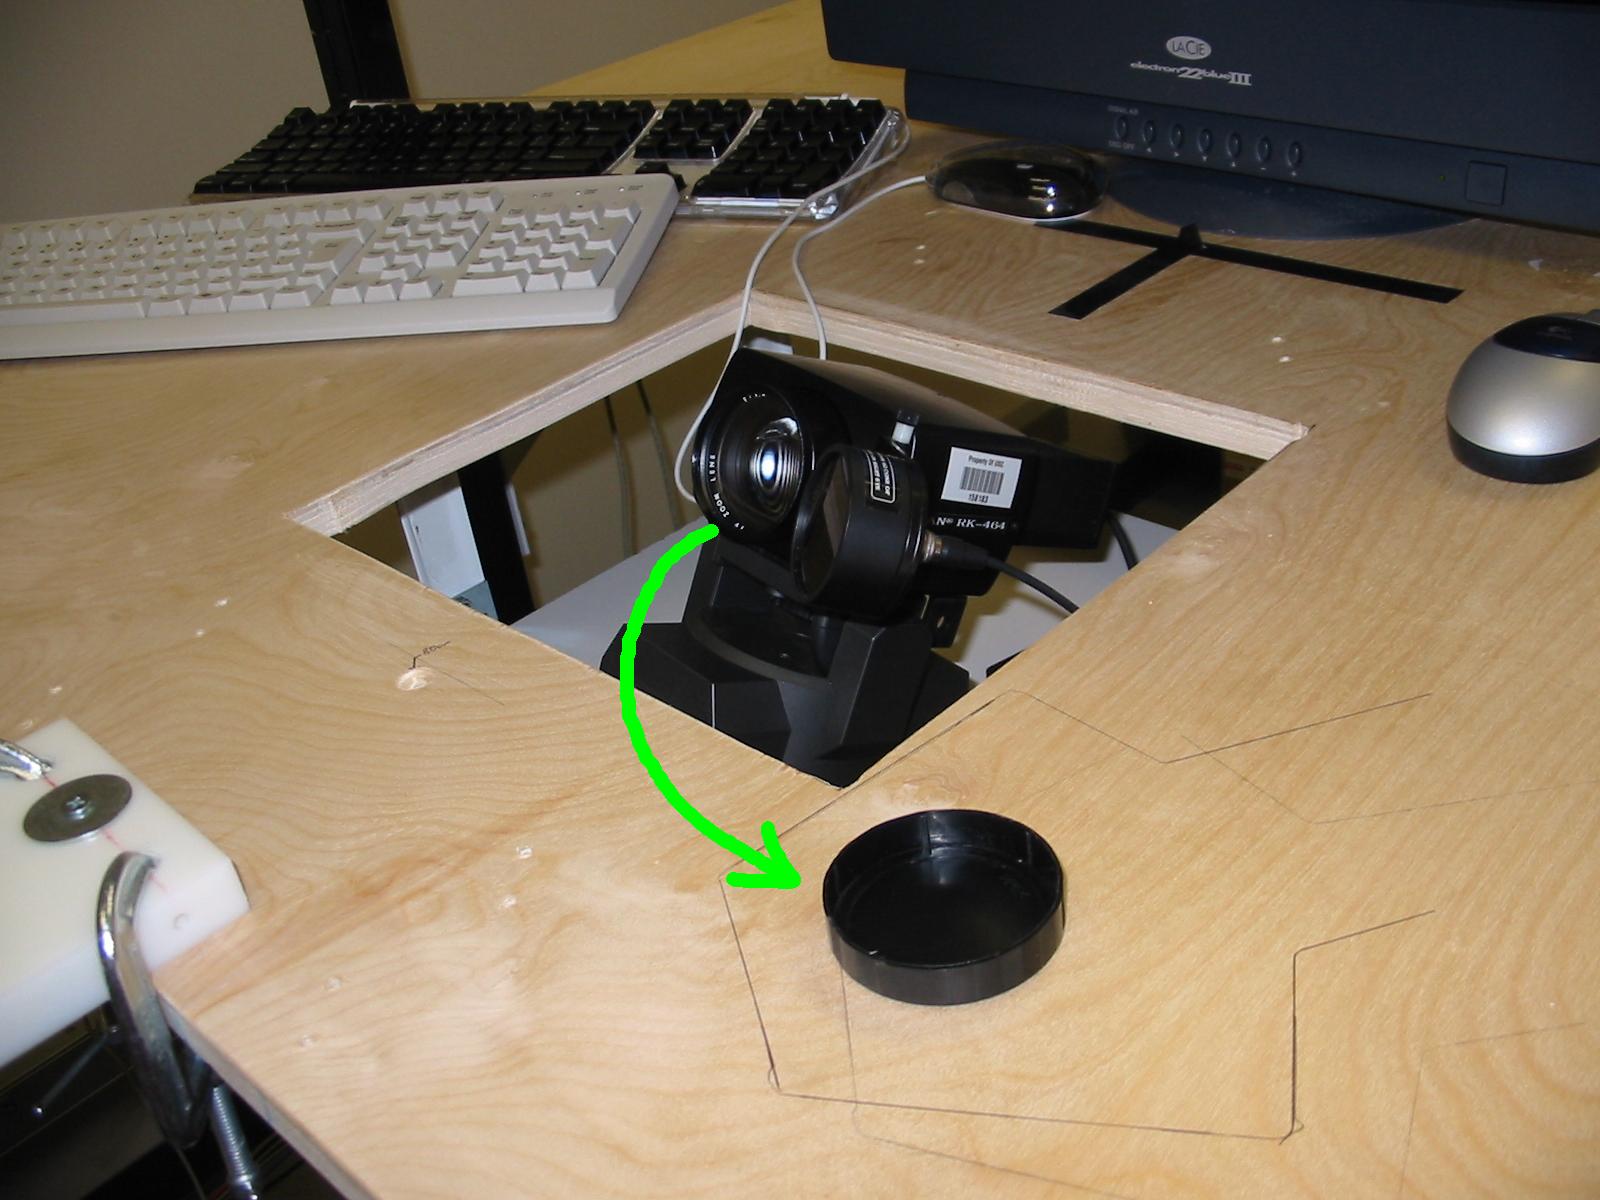 |
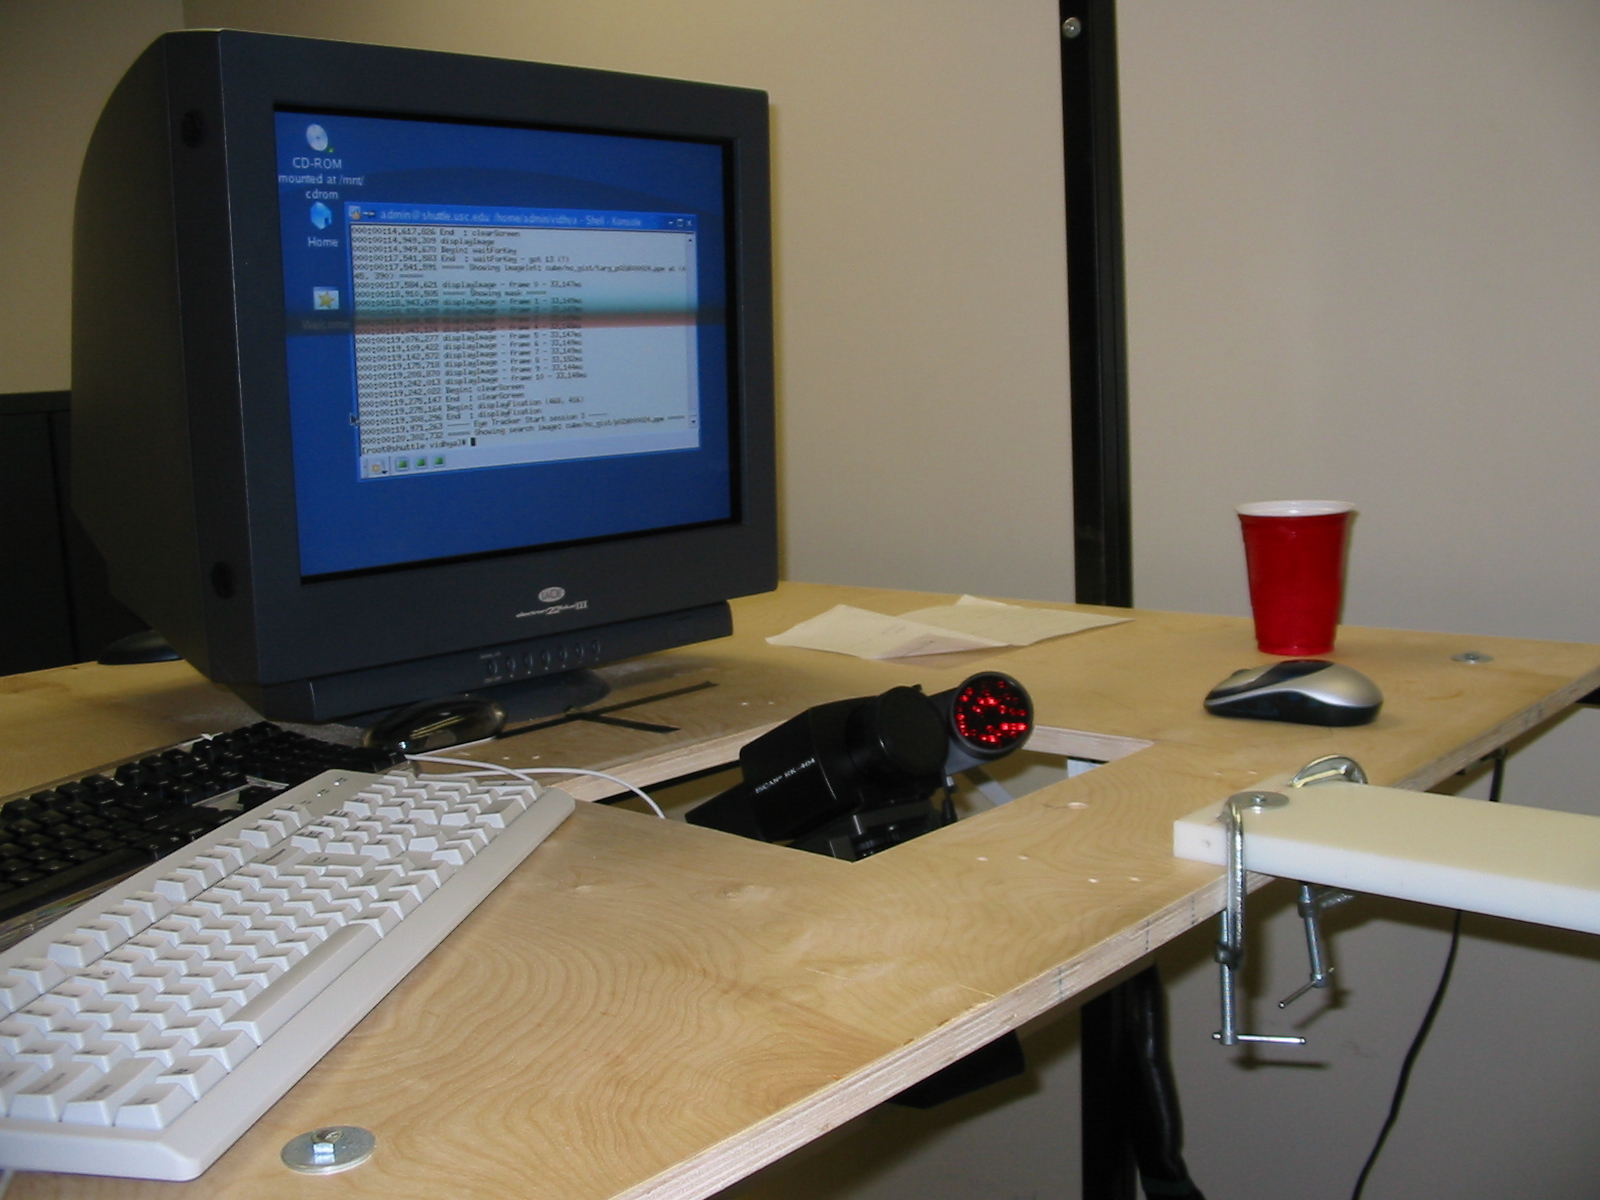
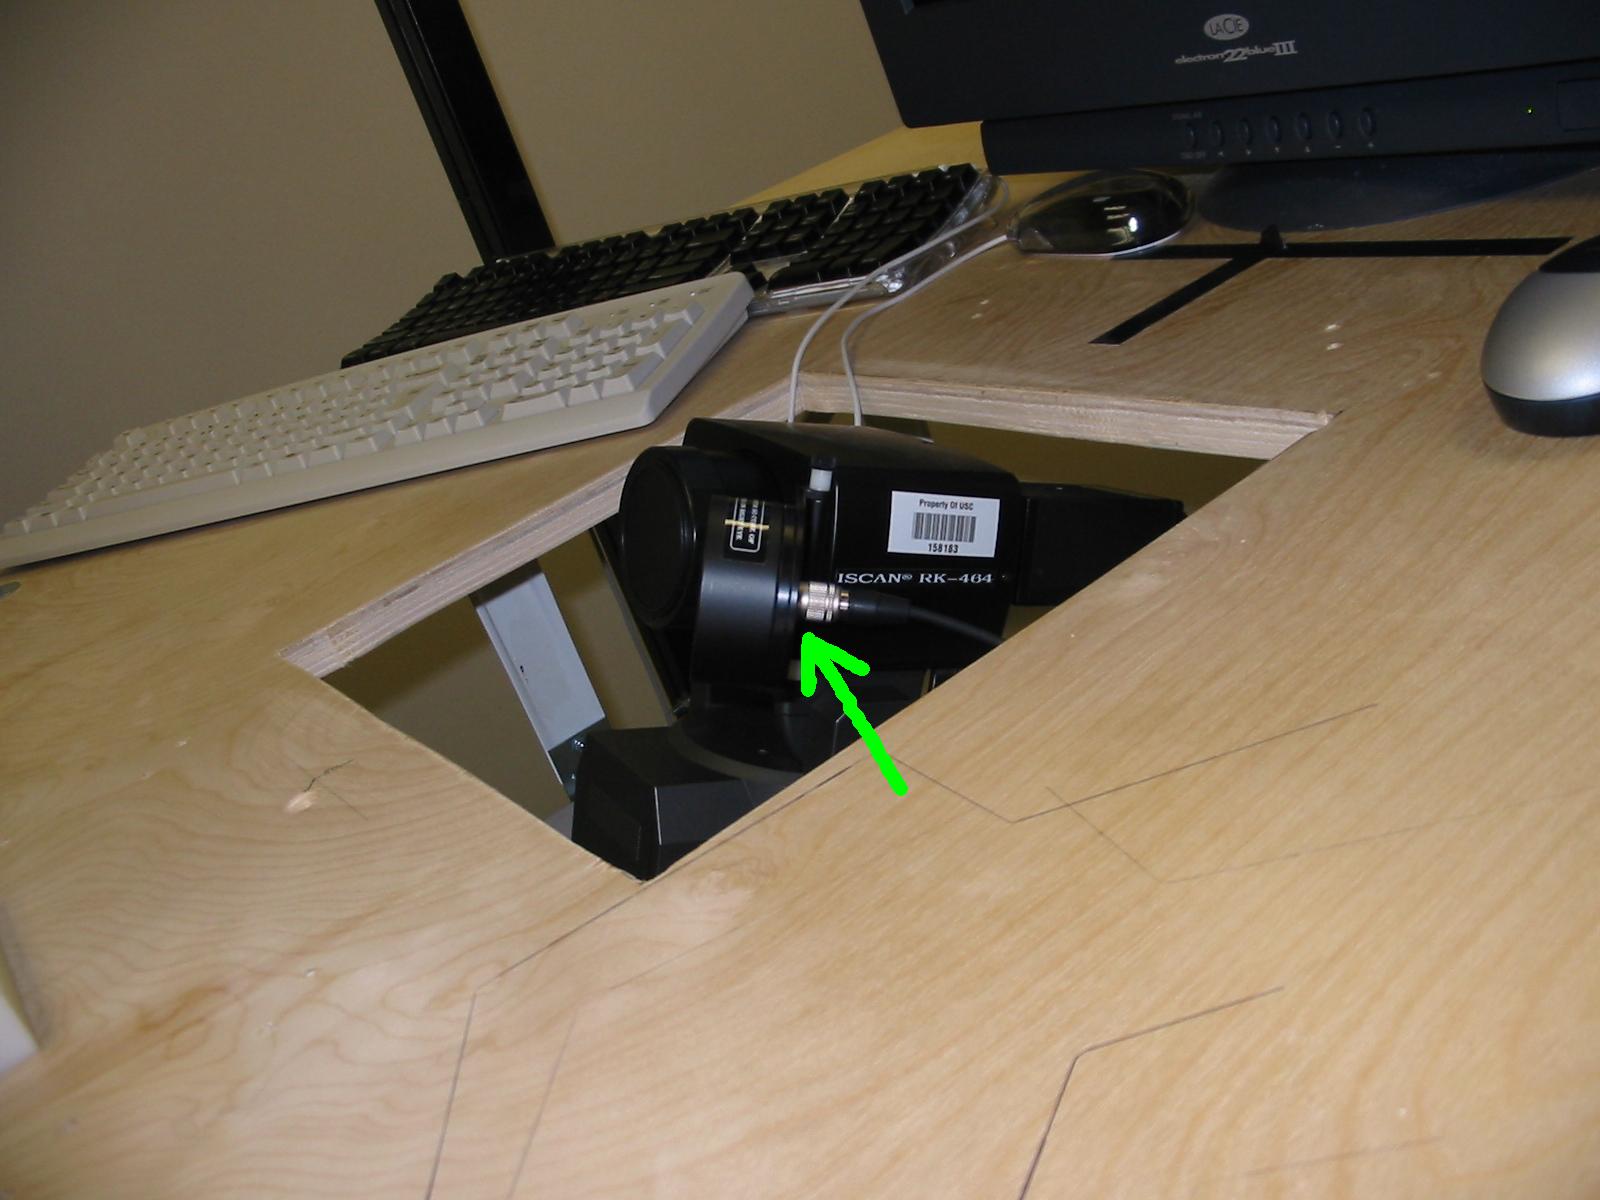
Remove the cap from the camera lens and check that everything is clean. |
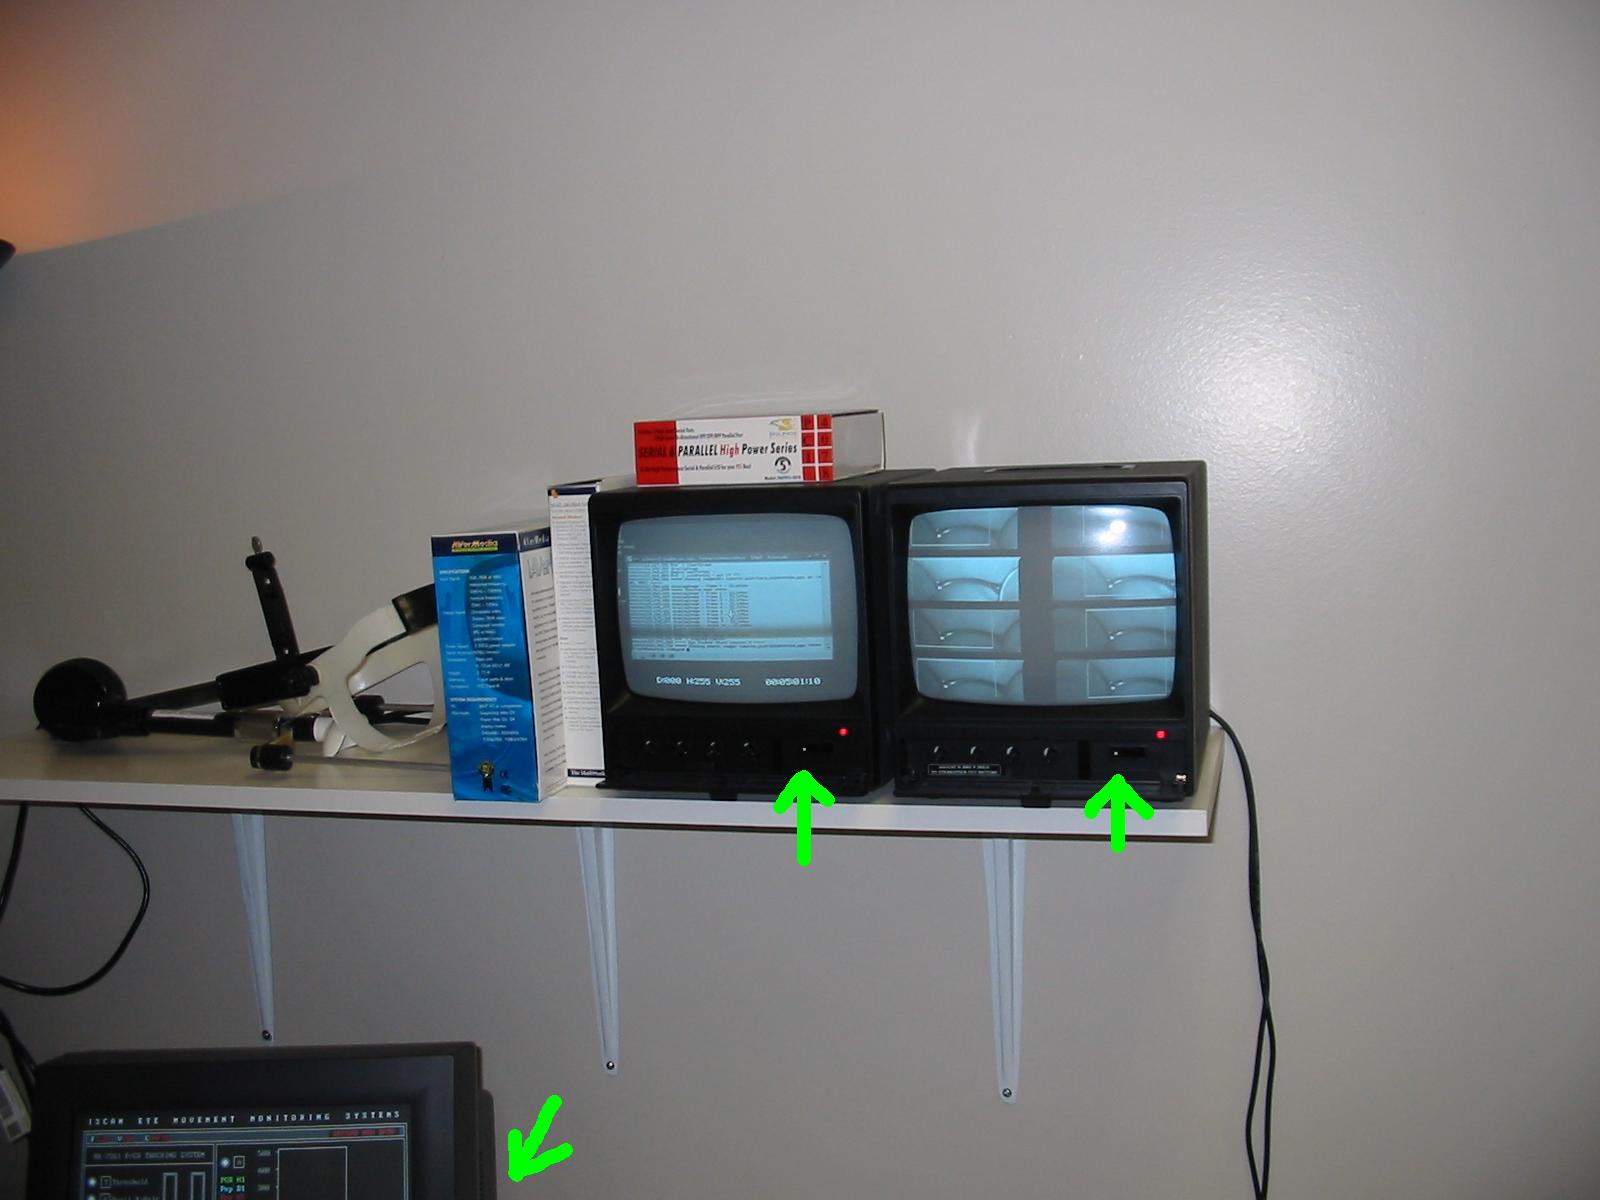 |
Power-on the monitors and check that you can see your subject's face, your stimulus, and start the ISCAN Daq program. |
 |
Use the pan/tilt controls and the zoom/focus/iris controls (on the separate control box not shown here) to zero-in onto your subject's right eye. CAUTION: make sure the camera does not hit the table as you move it around, since the hole in the table is fairly small. Get some ambient light using the halogen torchiere. |
 |
Once you have the eye well centered, ask your subject to start holding still. Also ask your subject to quickly cycle through the four corners of the screen to make sure the pupil will not get out of the camera's field of view as the eye moves. |
 |
Adjust the orientation of the infrared light source to obtain the clearest possible image of the eye on your control monitor. |
 |
Press F7 to activate the pupil threshold, then the up and down cursor keys to adjust it. Press F8 to activate the corneal reflection threshold, then the up and down cursor keys to adjust it. See below for what you should see on the control monitor once the thresholds are correct. |
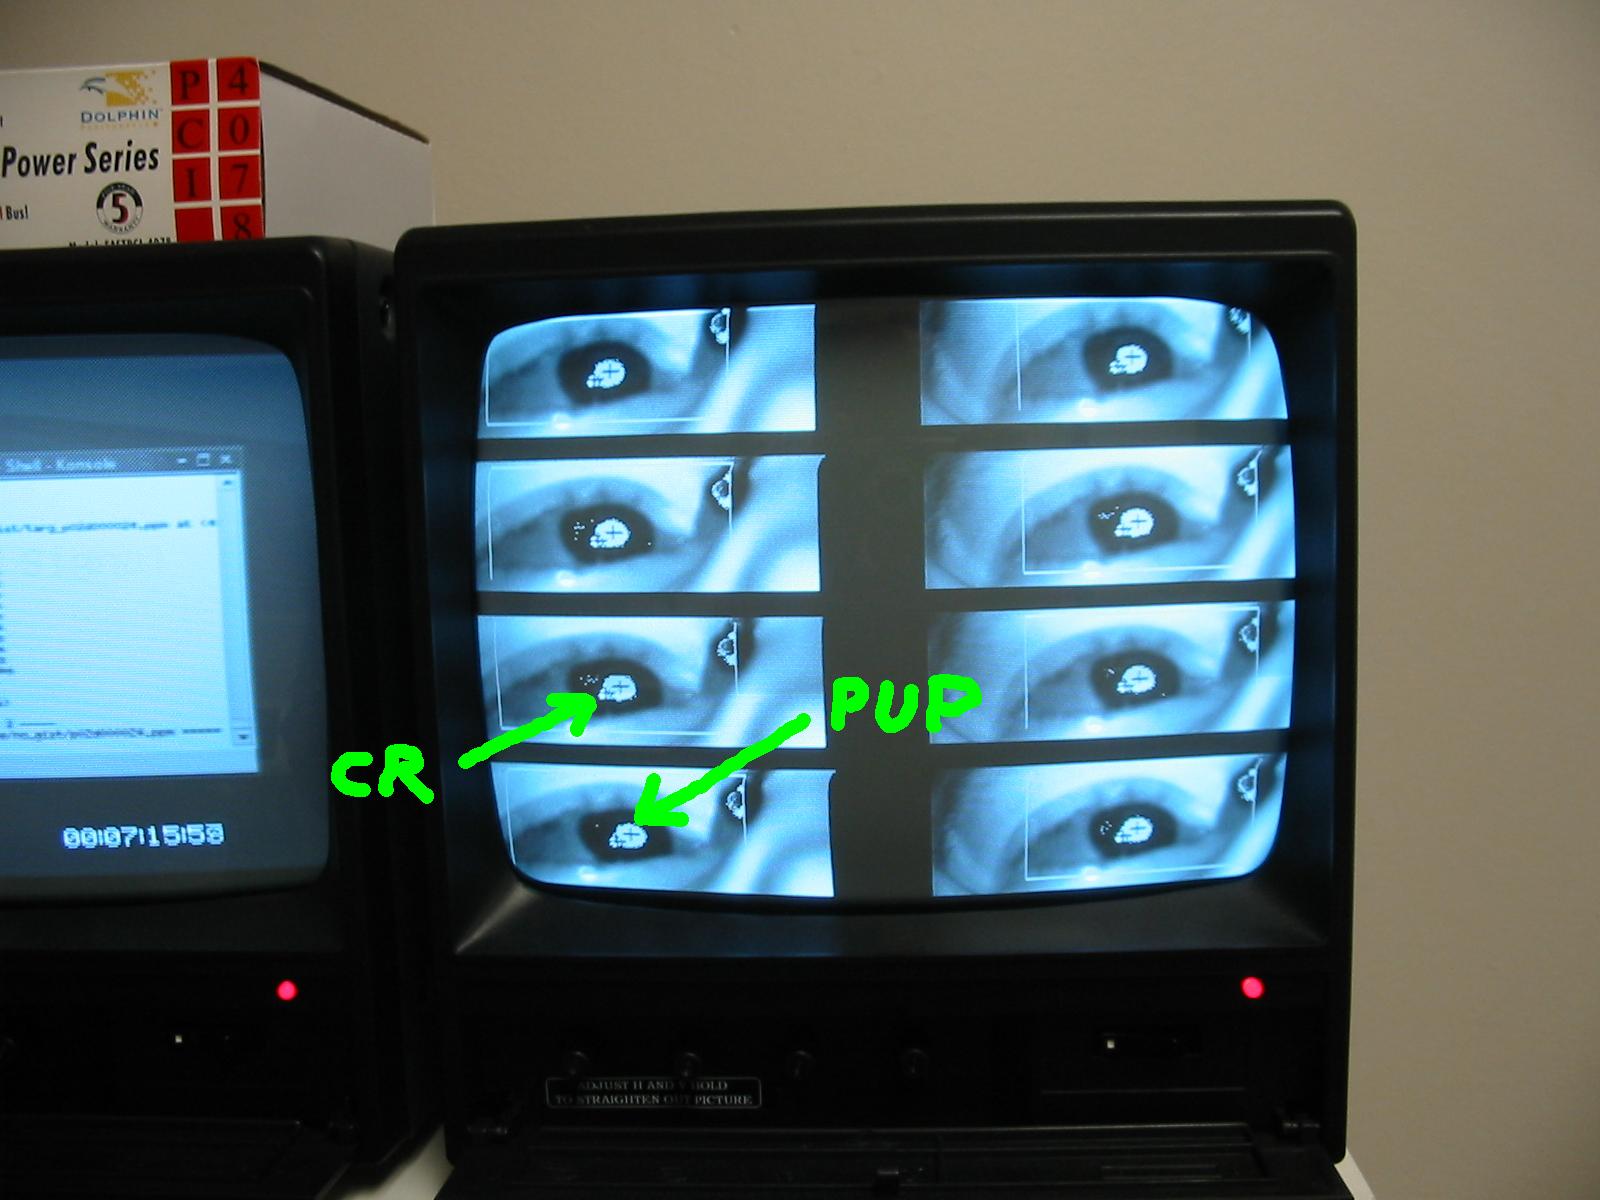 |
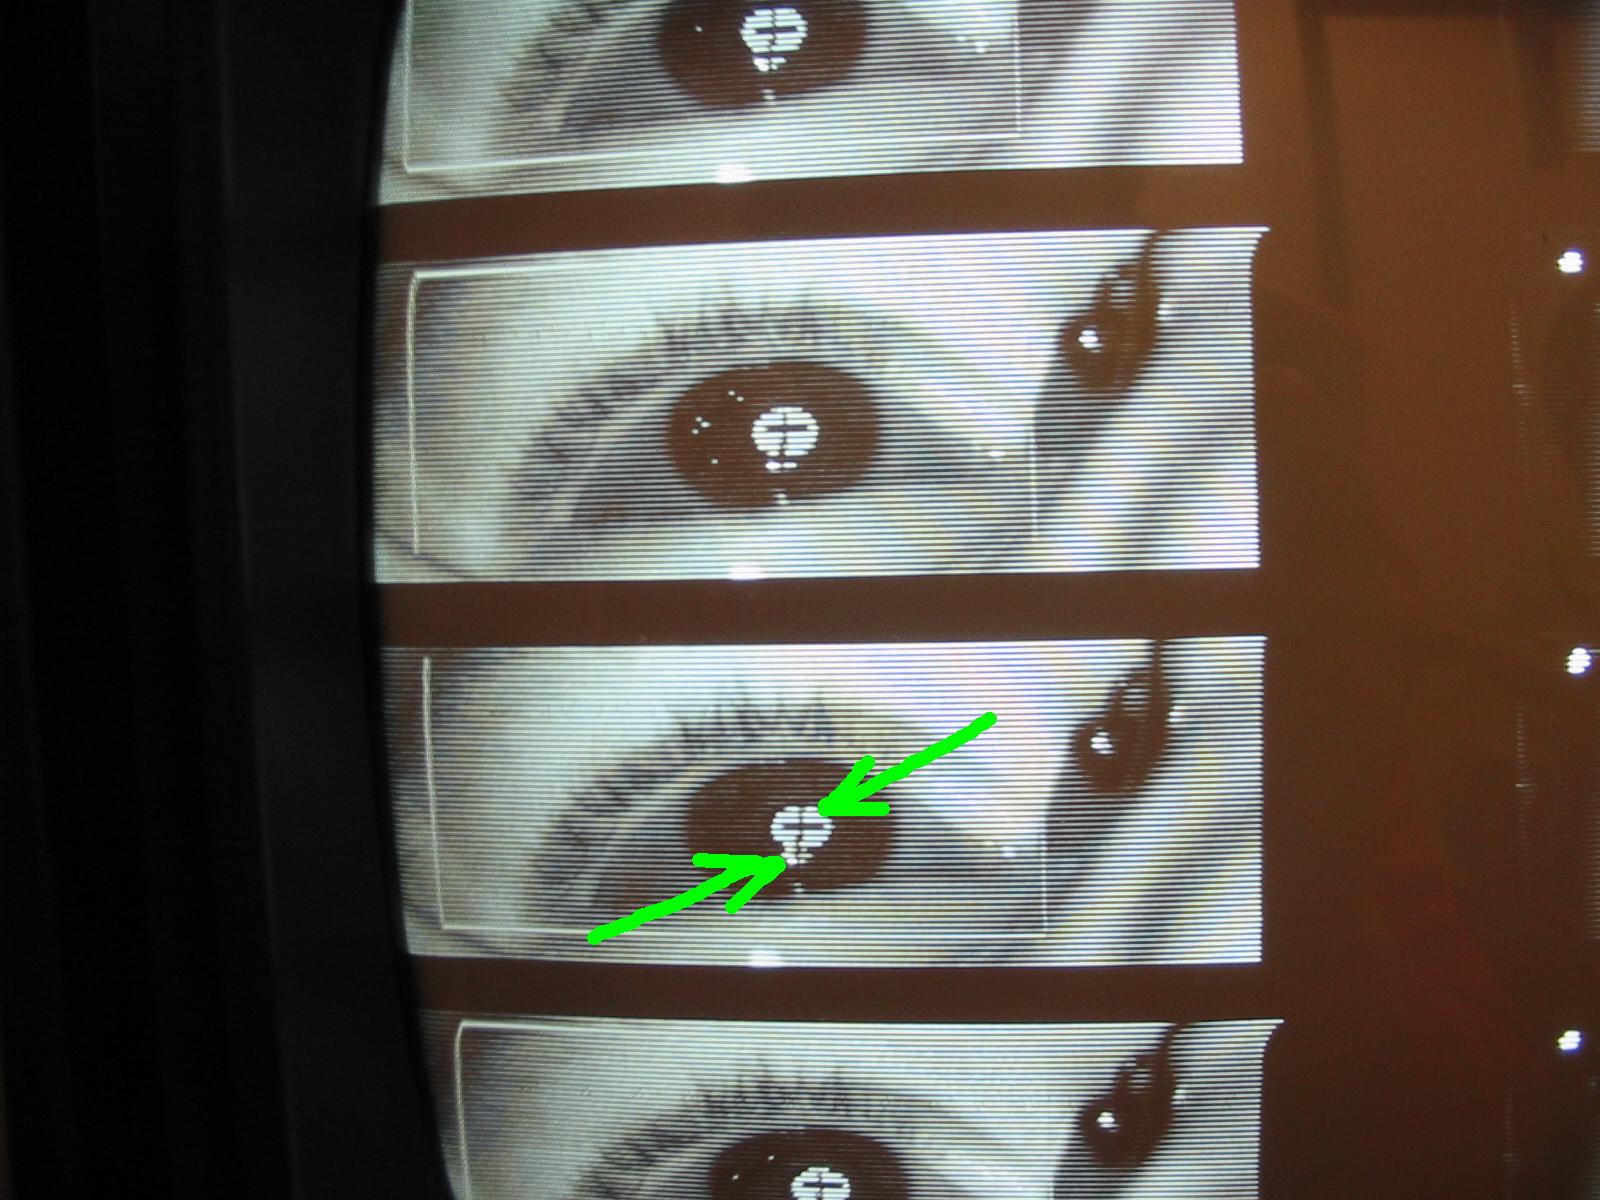
Play with the pupil threshold (F7 and up/down keys) until you have a clean white disk on the pupil and a cross at its center. You don't want too much junk outside the pupil. Play with the corneal reflection threshold (F8 and up/down keys) until you have a cleanly segmented specular reflection of the infrared light onto the subject's eye, and a cross on it. It is okay if the corneal reflection overlaps with the pupil. |
 |
When adjusting the pupil threshold, try to minimize noise pixels outside the pupil, yet try to find a threshold where the cross reliably stays on the pupil (ask your subject to look at various places and blink). Typically, it is okay to have a bit of noise on the iris and eyelashes. Avoid the presence of other hot spots in the image (e.g., here we have a couple on the subject's eyeglasses), as they may be confounded for the pupil and/or corneal reflection. Play with zoom and focus using the control box. |
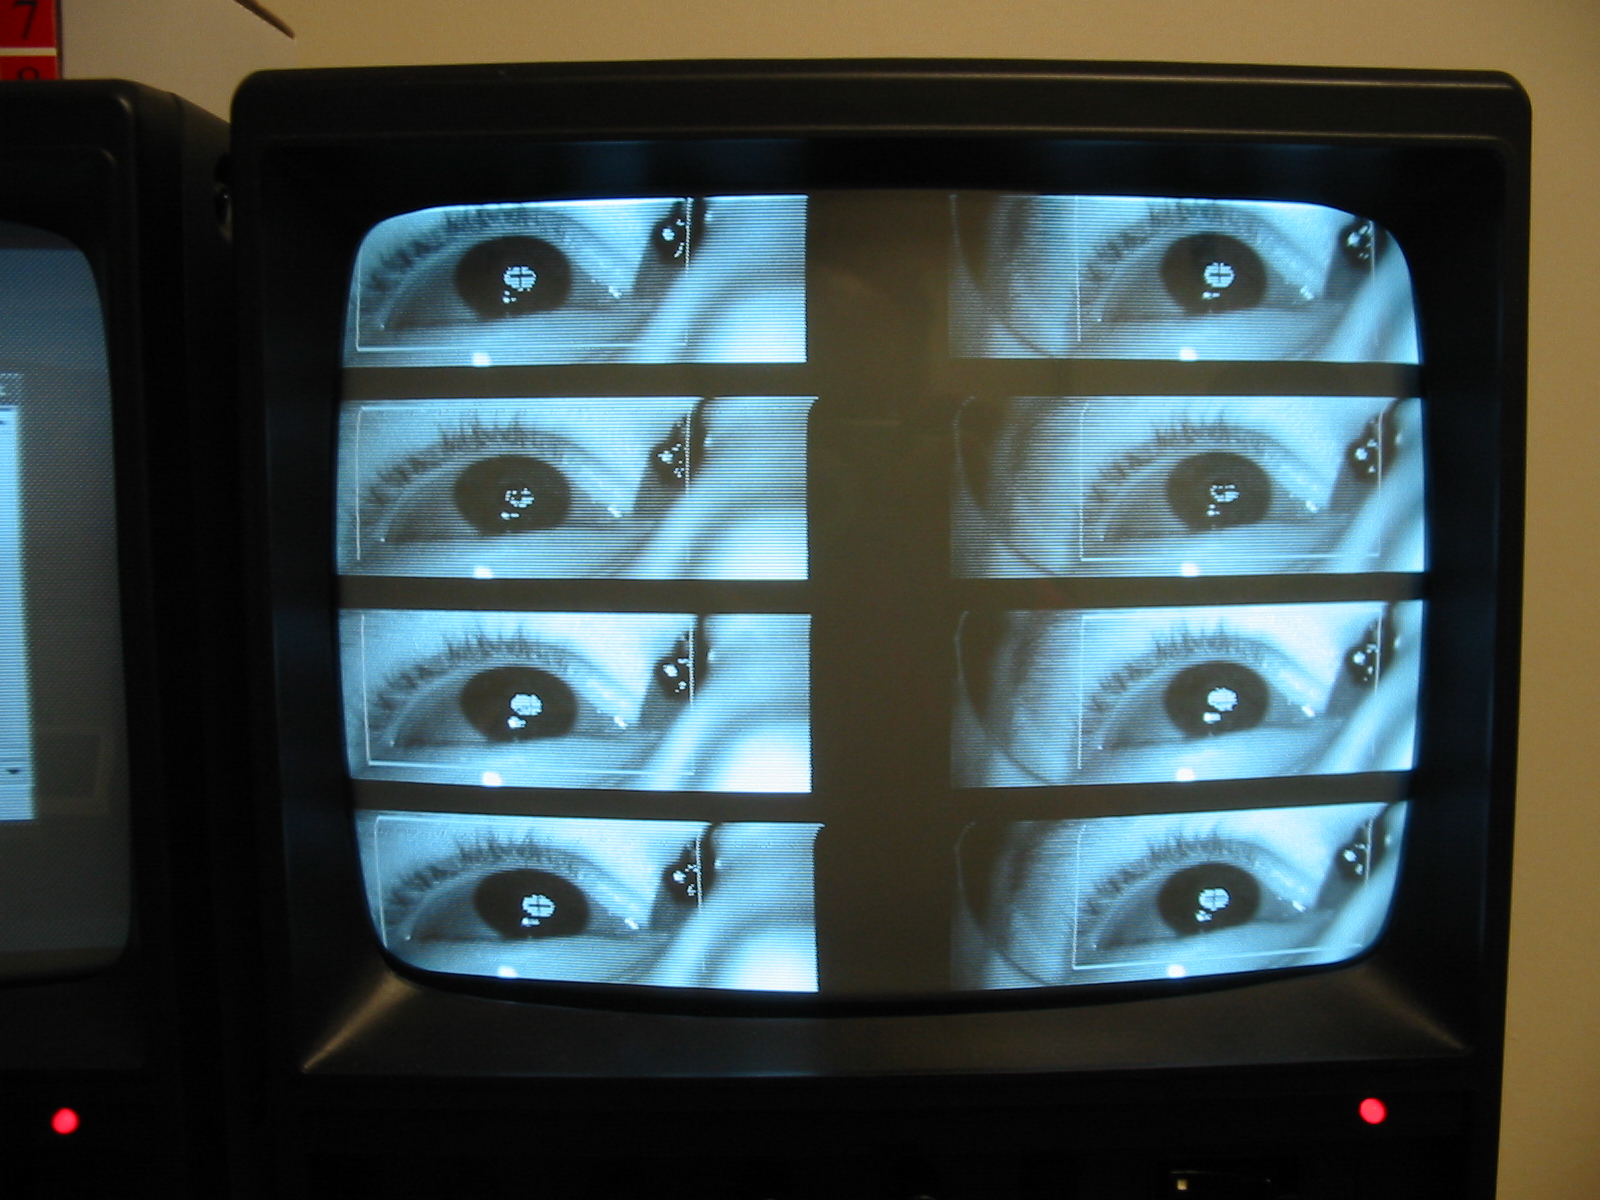 |
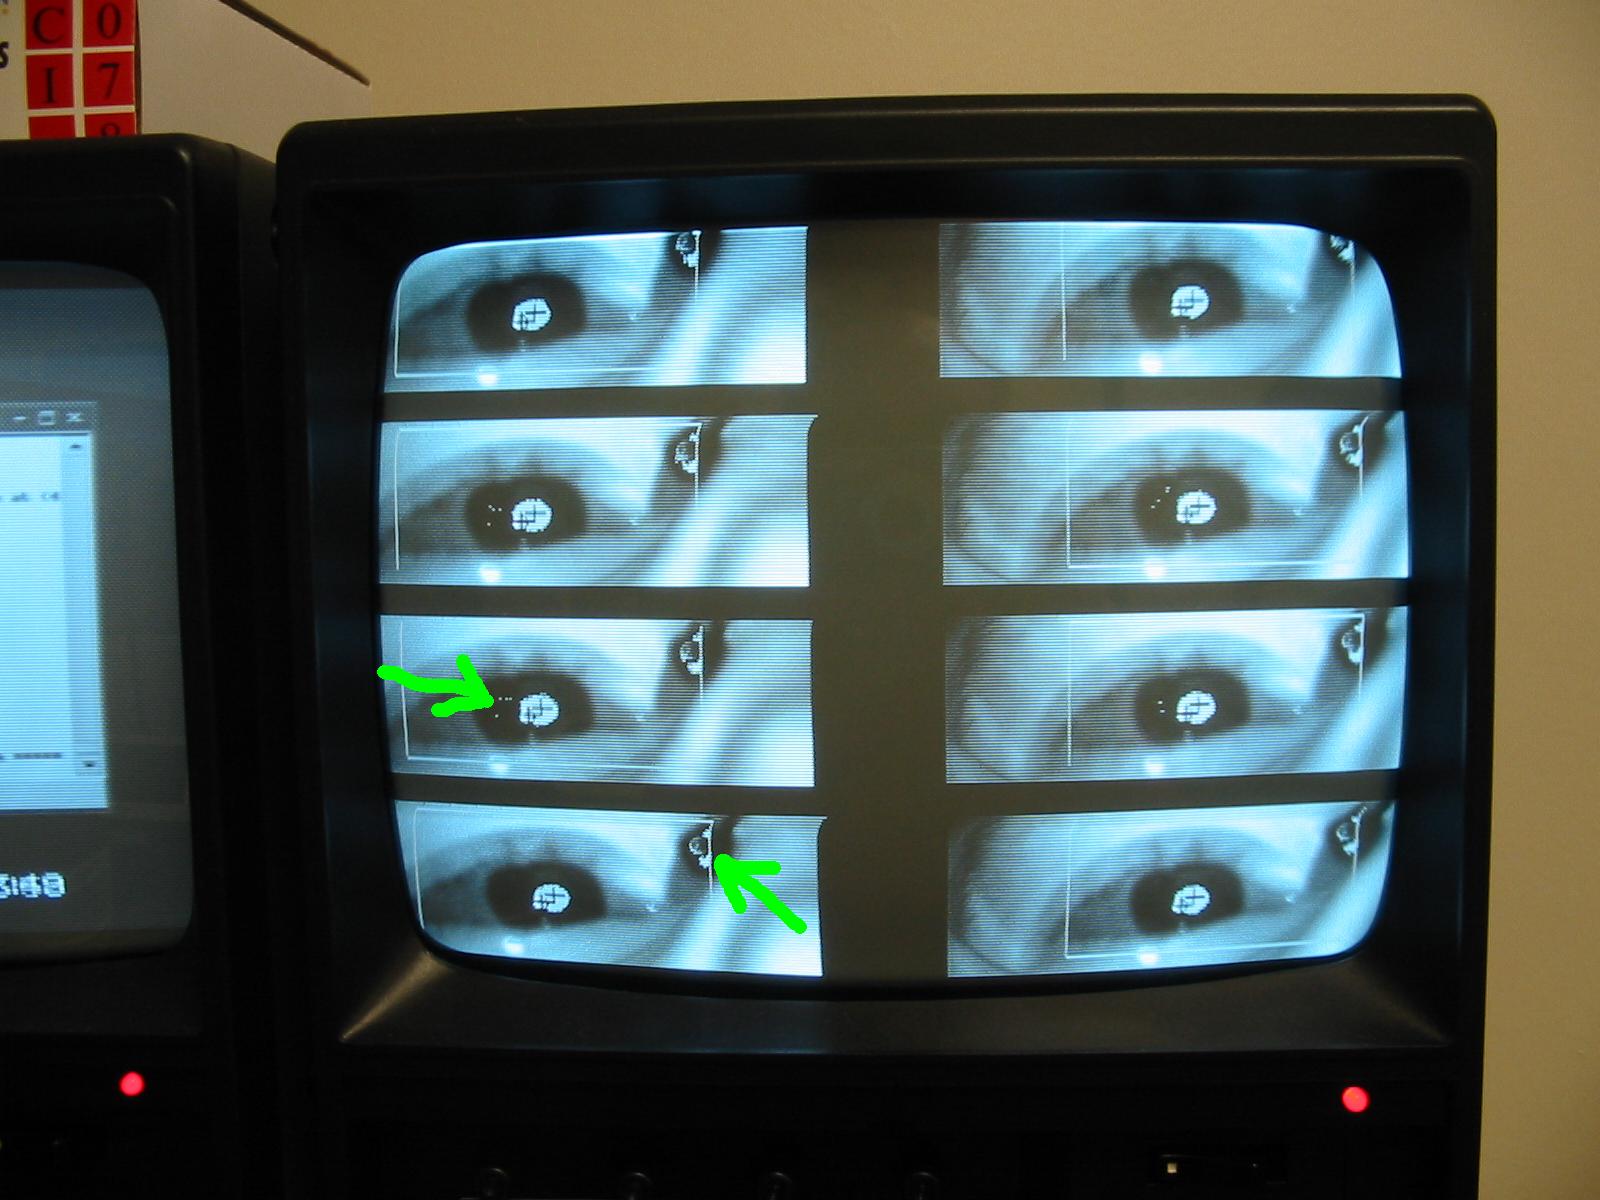
Once you are well zoomed, focused, centered, and thresholded, it should look like that. The crosses should be robustly present even if you move your threshold up/down a bit. |
 |
That's looking good to me! |
 |
Switch the tracker to 'move' mode by pressing the M key. You should start seeing some scrolling traces. |
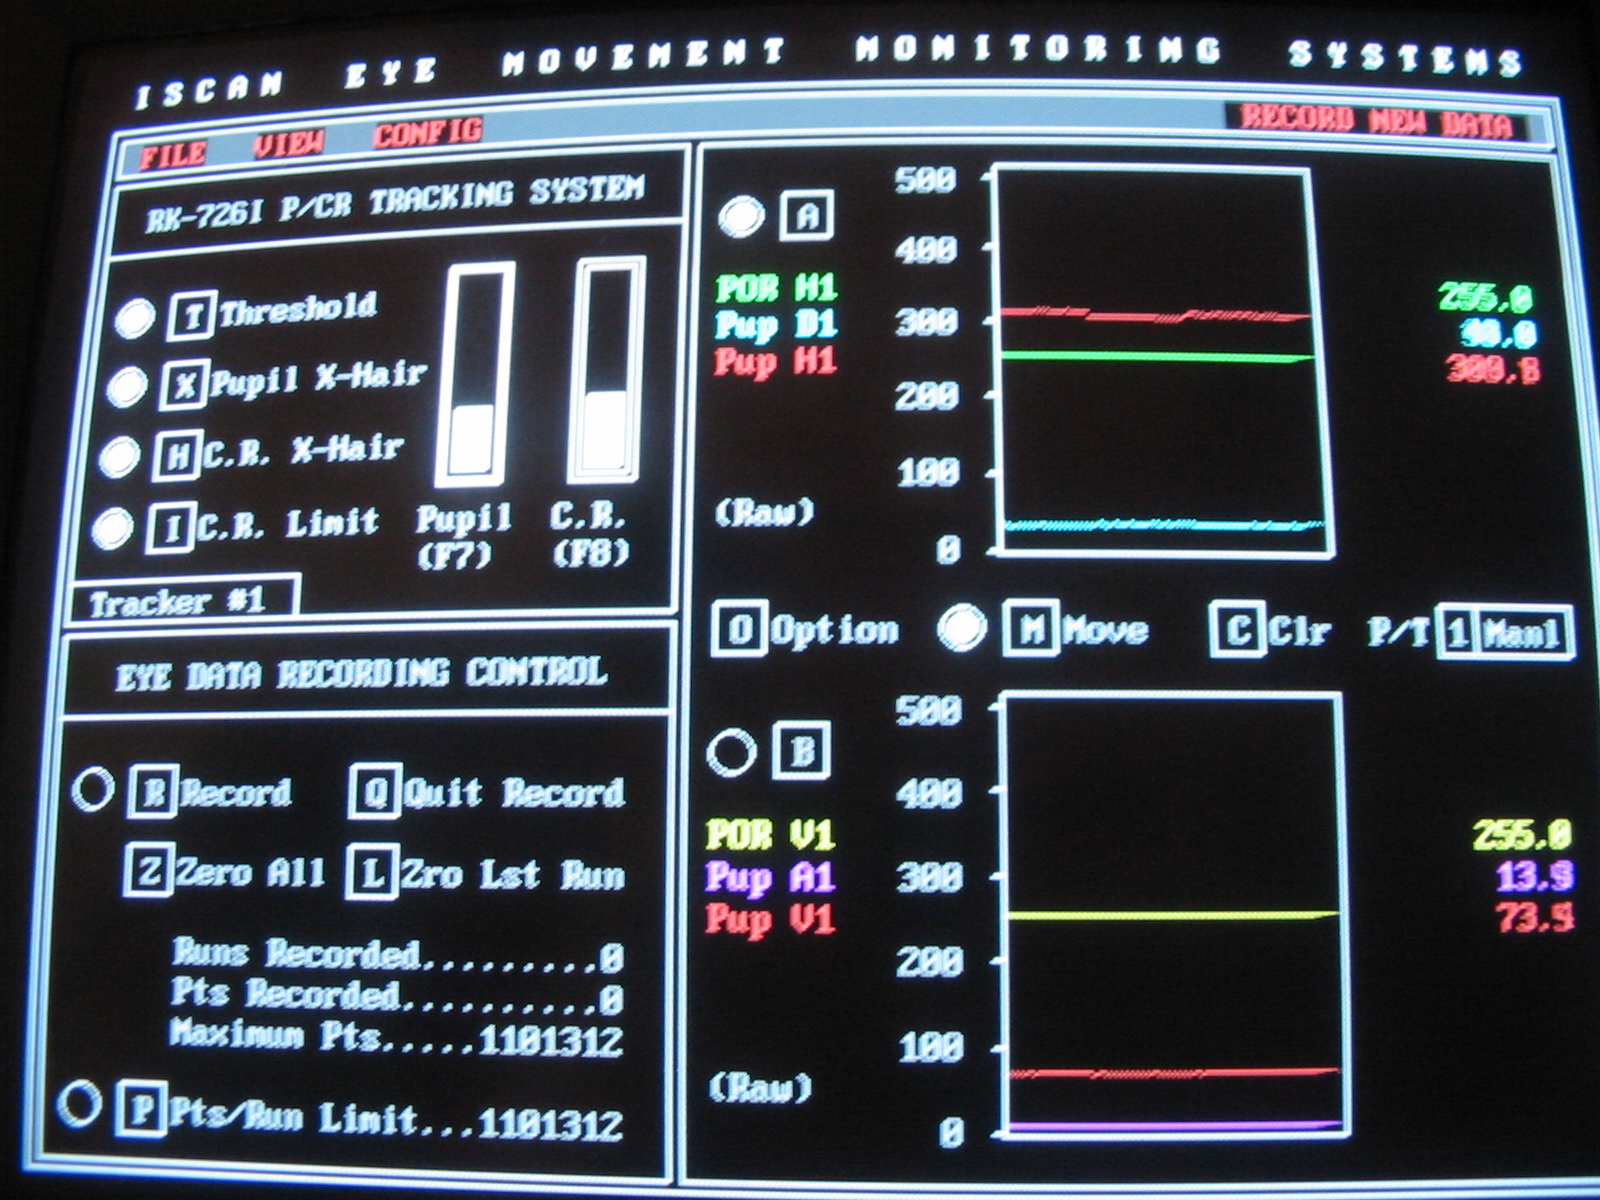 |
The scrolling traces for POR-H1 (point-of-regard, horizontal) and POR-V1 (vertical) will be flat as the tracker is not yet calibrated. The others should move when you subject makes eye movements and blinks. |
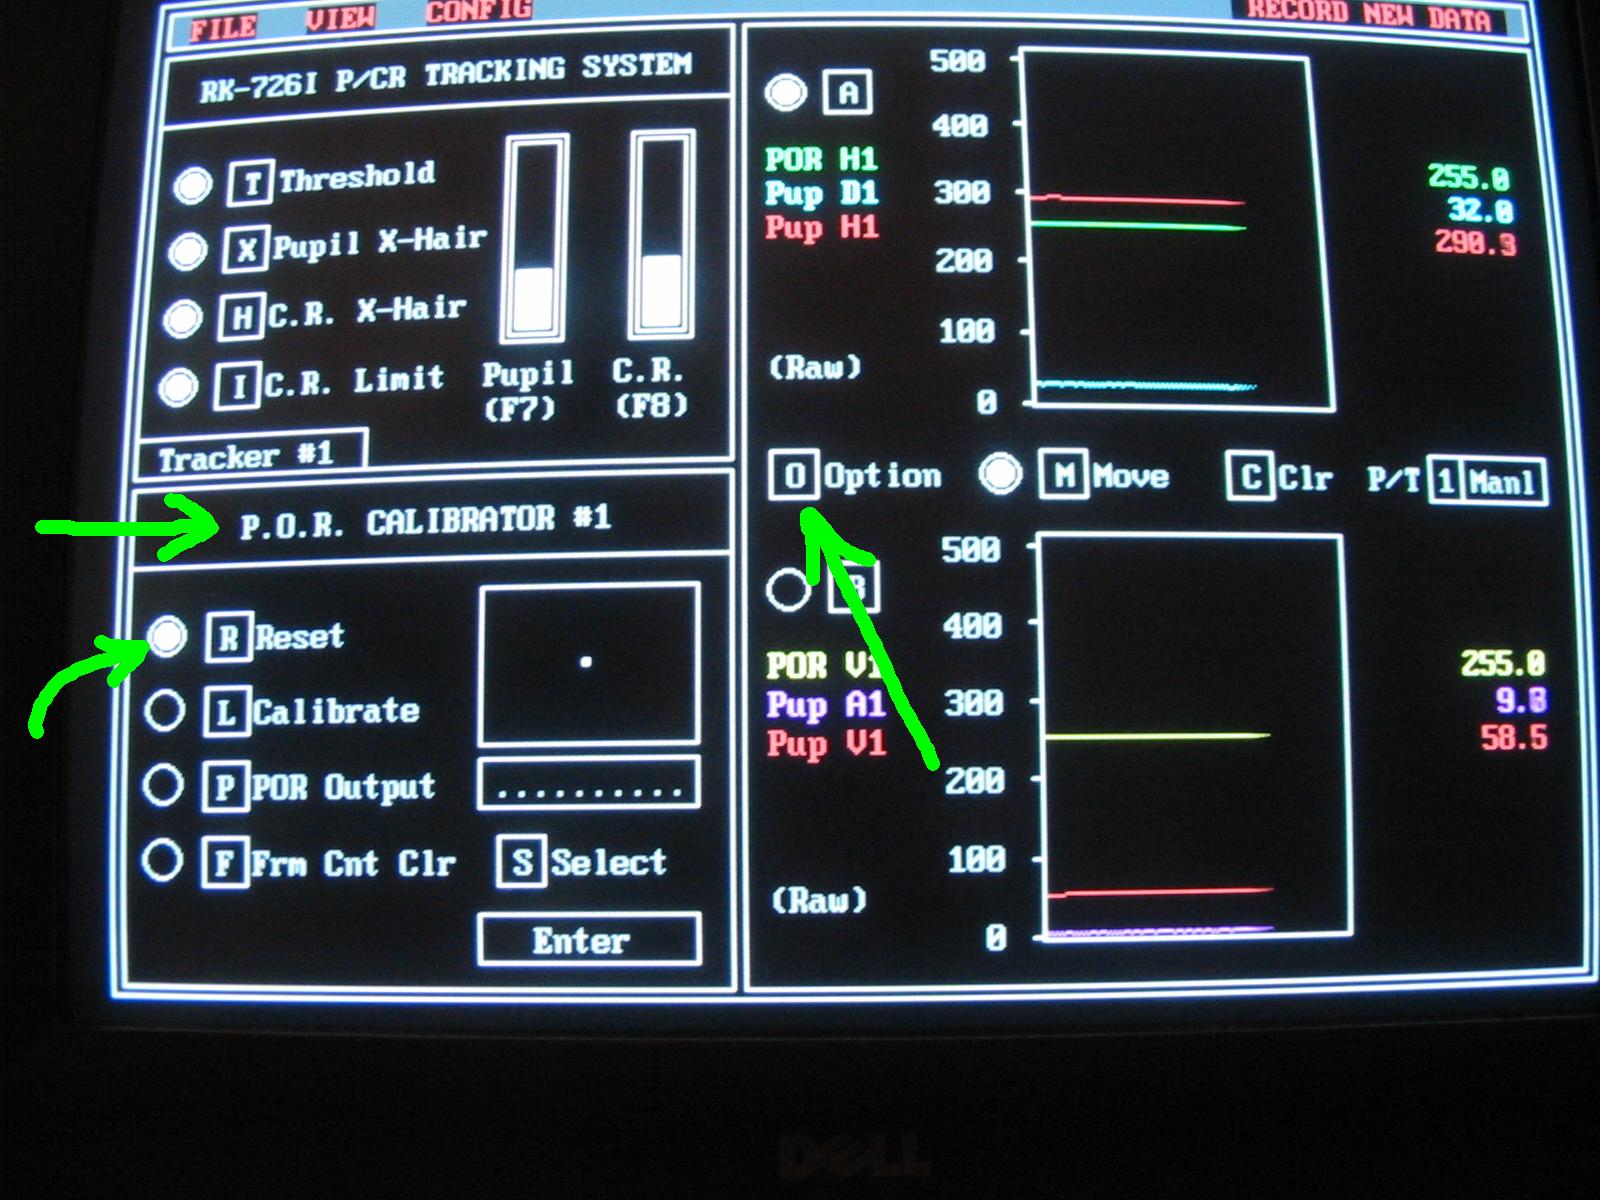 |
Now do the POR (point-of-regard) calibration; POR is computed from the comparative pupil and corneal reflection measurements. To see the POR you first need to calibrate the tracker (this is the Daq-based calibration and is necessary to get POR data at all; you will then typically also have a more sophisticated calibration procedure as part of your stimuli once the Daq is all ready to go). Press the Option key O several times until you see the 'P.O.R. Calibrator #1' screen. Press R to reset. |
 |
Start your stimulus program with a central fixation. |
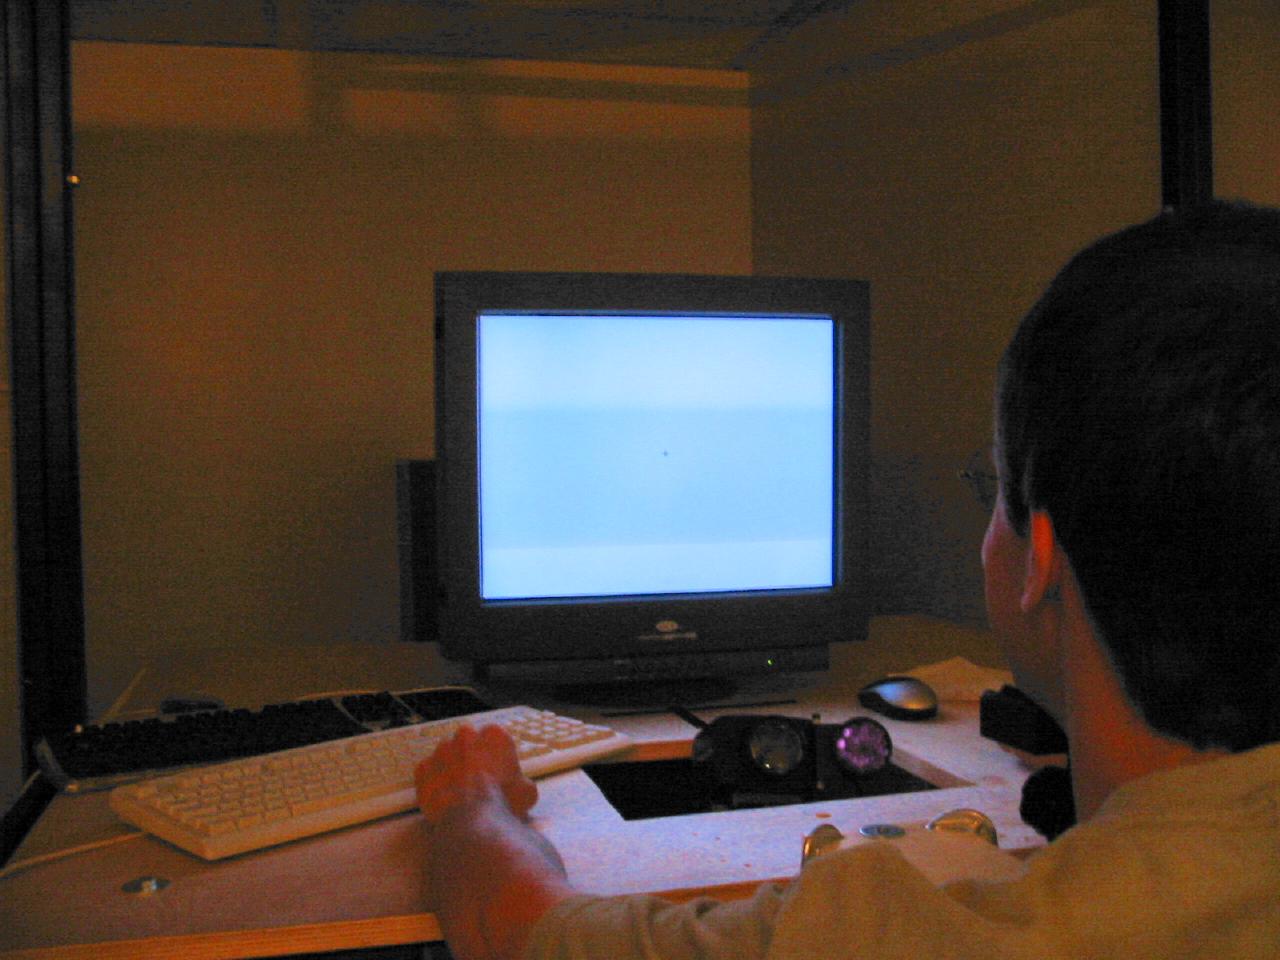 |
Make sure your subject is ready for action and knows where to press keys (as needed by your paradigm) and already has the keyboard and such properly positioned; otherwise your subject will move later on, in order to try to find the keyboard or locate a key to press! |
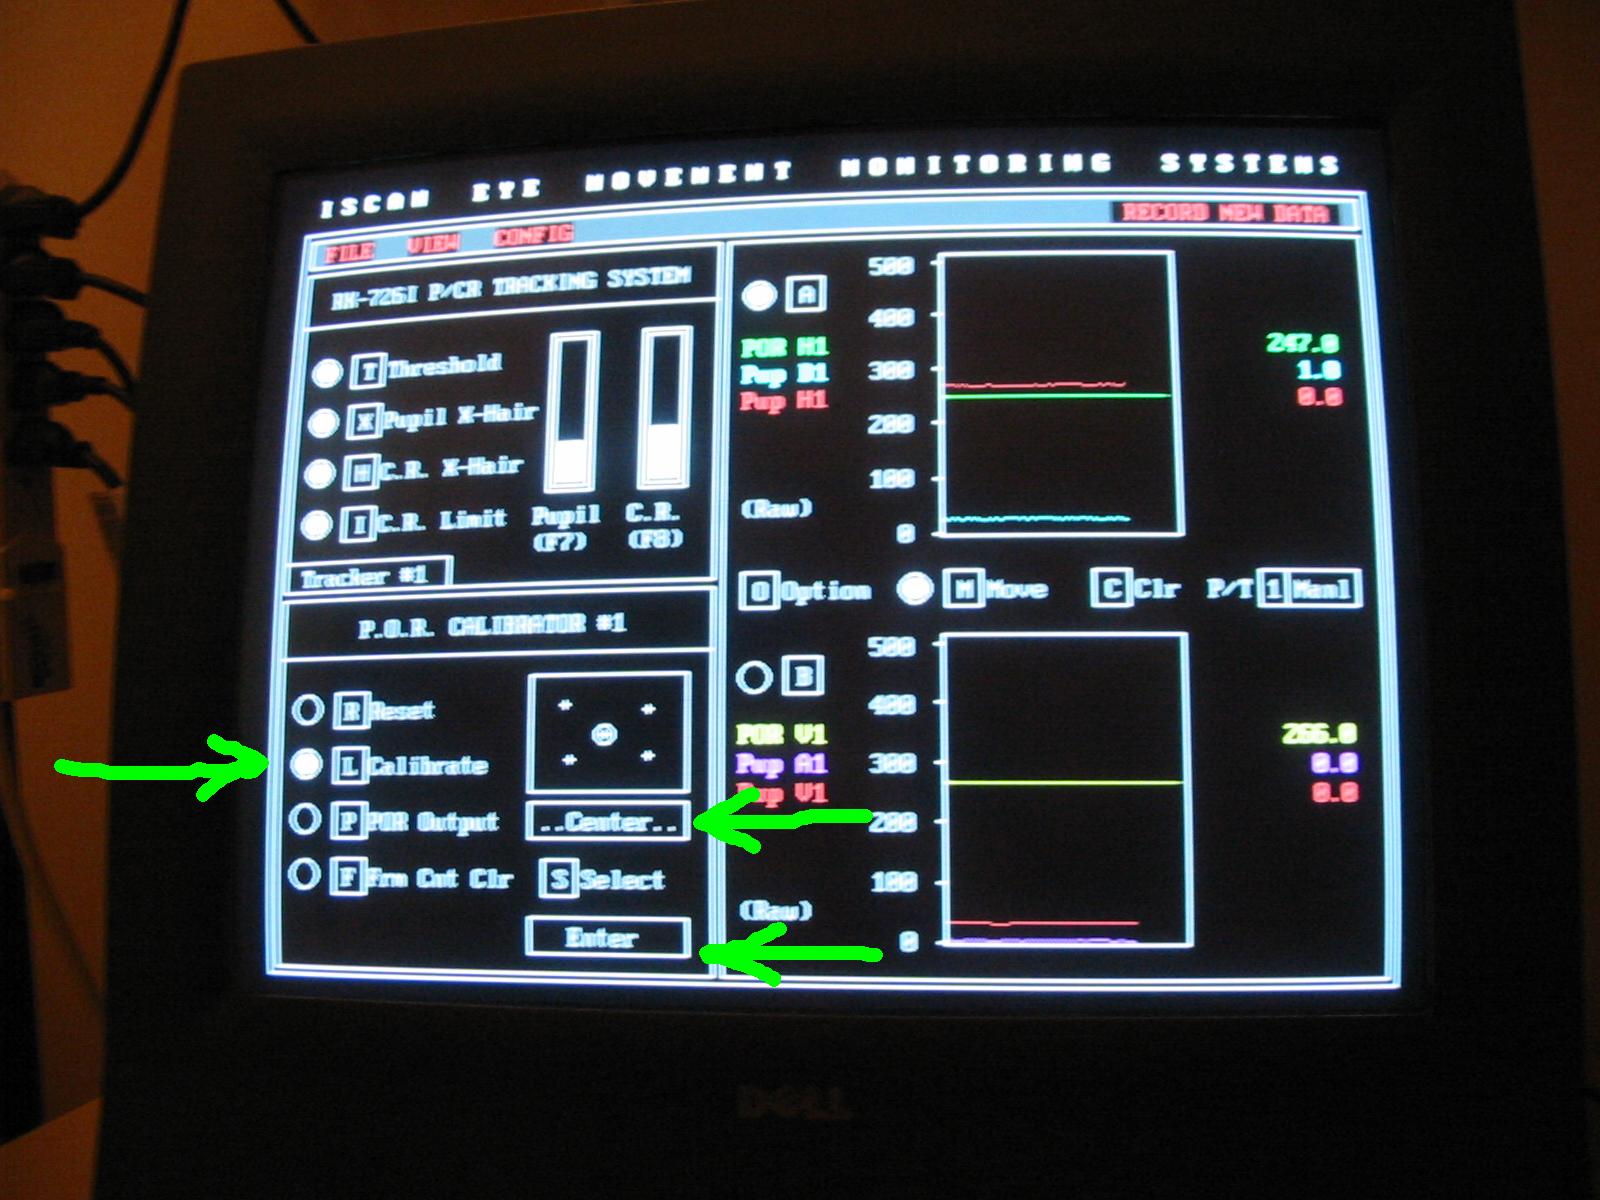 |
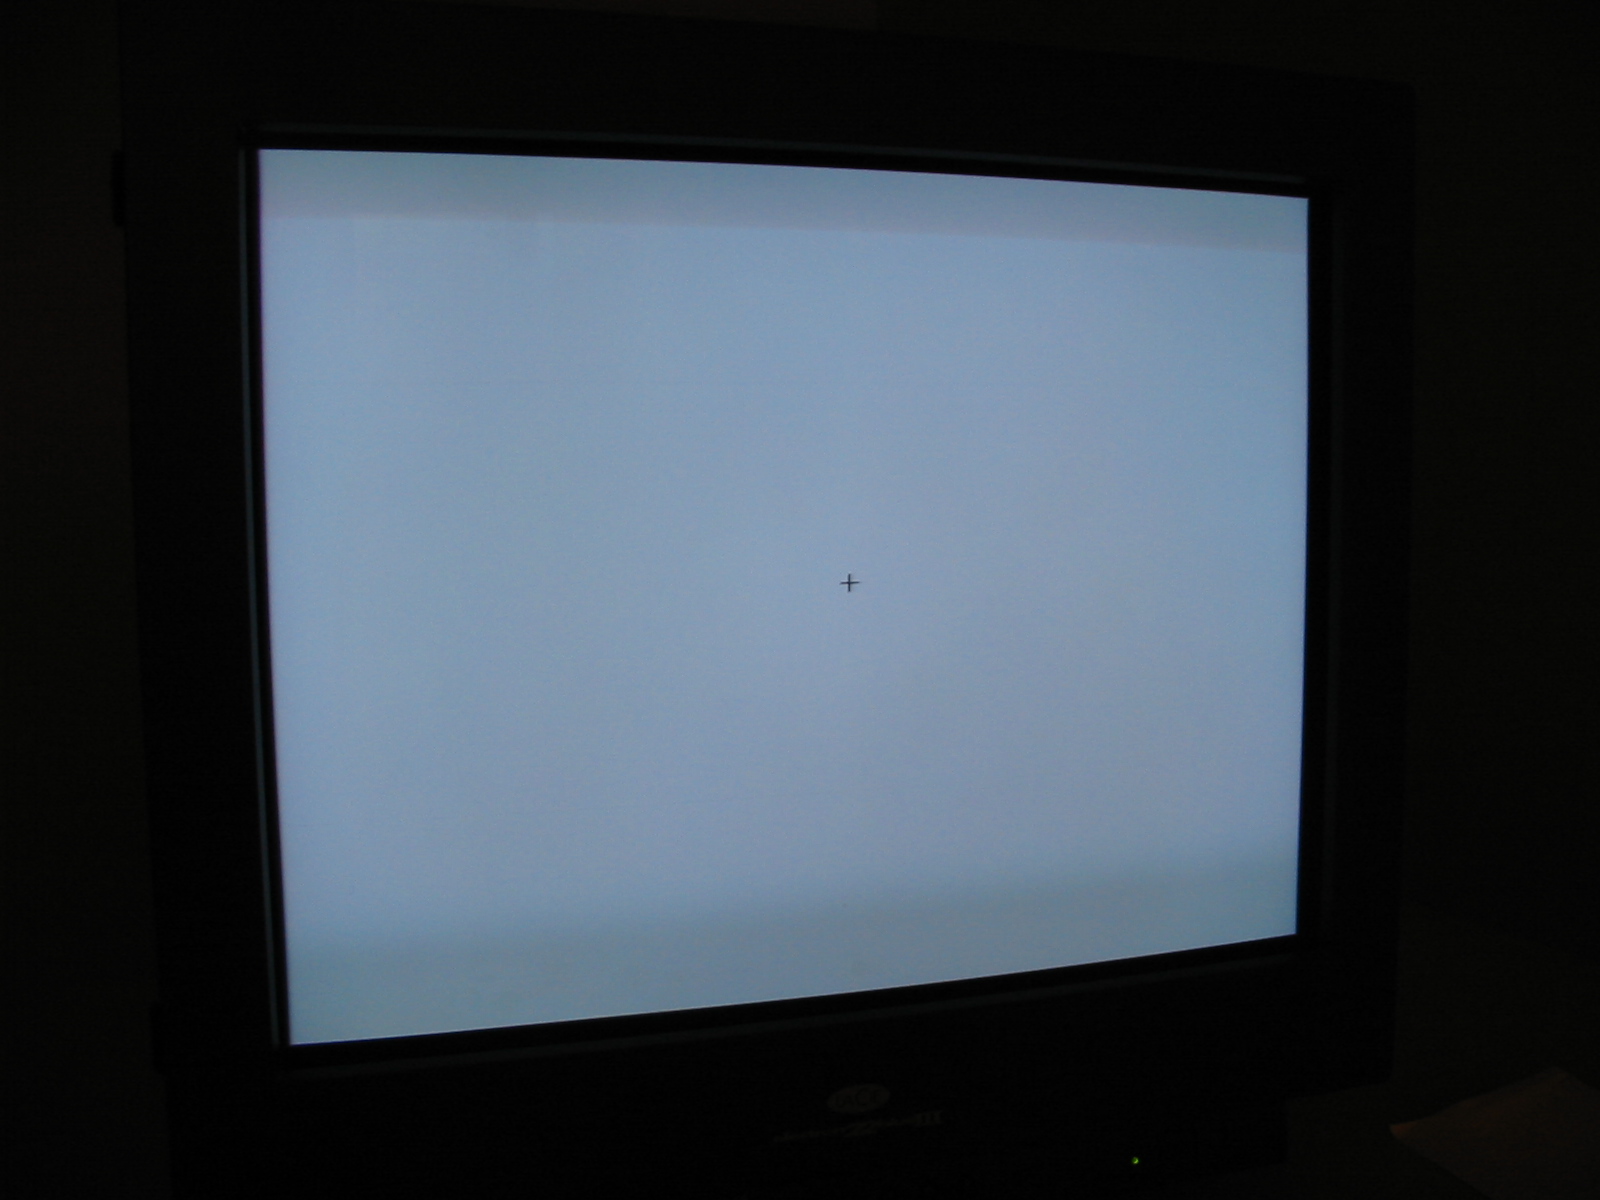
Press L to start the Daq calibration. The program shows you where the subject should look (here, it's at the center). Tell your subject to look there. While you look at the control monitor that shows you the close-up of the eye, press RETURN to validate that position. It is important to check the eye monitor WHILE you press RETURN so that you will know whether the subject just blinked or moved as you acquired the calibration point (in which case you will have to redo the calibration). |
 |
Once you have gone through all calibration points and pressed RETURN to acquire each one, press R to reset, the P to activate the point-of-regard output. The POR traces should now change as the subject's eyes move. |
 |
Also, once POR output is activated, the cross on the scene monitor will follow the subject's point of regard. Ask your subject to look at various places and check that the cross goes to those places. If the calibration does not look too good, re-do it (R, then L, then RETURN for each point, then R then P). Also the H and V numbers on the scene monitor should vary as the cross moves around. |
 |
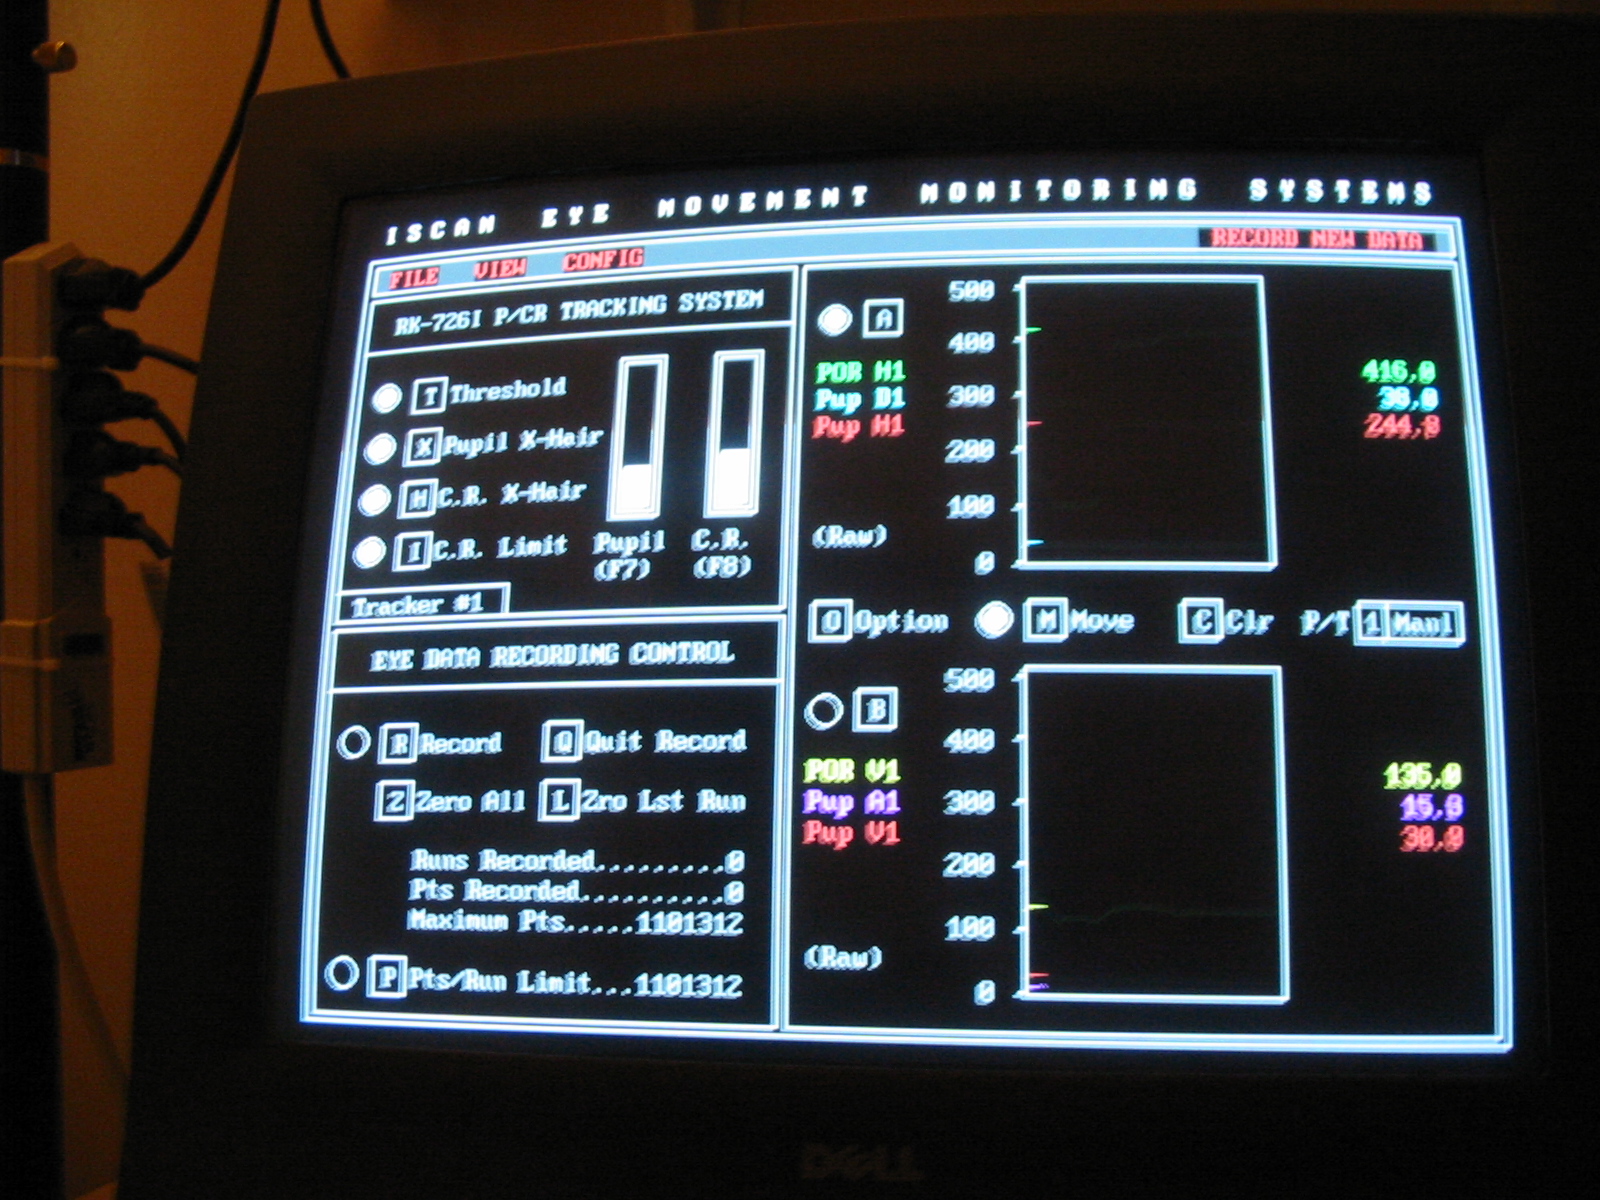
CAUTION: the eye tracker will not record unless you have the 'Eye data recording control' window displayed; to get it, press O (option) several times until you get it. Your tracker is now ready to start recording either using manual trigger (R/Q keys, not recommended!) or external serial-port trigger (that's what you want for clean data). |
 |
Ask your subject to look at various things one more time, check that you get reliable POR-H1 and POR-V1 traces, reliable crosses at pupil and corneal reflection on the eye monitor, reliable cross following the eye on the scene monitor, and get started with your experiment! |
 |
Once you are done, don't forget to save your data! Press M to stop the move mode and the scrolling graphs. Now press 'ALT-F' to go to the file menu and select 'save raw data'; go to the right folder (use TAB and the cursor keys to highlight/select various things) and pick a file name, then save the file. Do not save it in the default directory (which is for eye tracker settings), rather go into the 'data' subdirectory and then your own subdirectory. The 'data' subdirectory is the one that also is available on the desktop. Quit the Daq program and use SmartFTP to drag/drop your data file to an FTP server of your choice. |
|
|
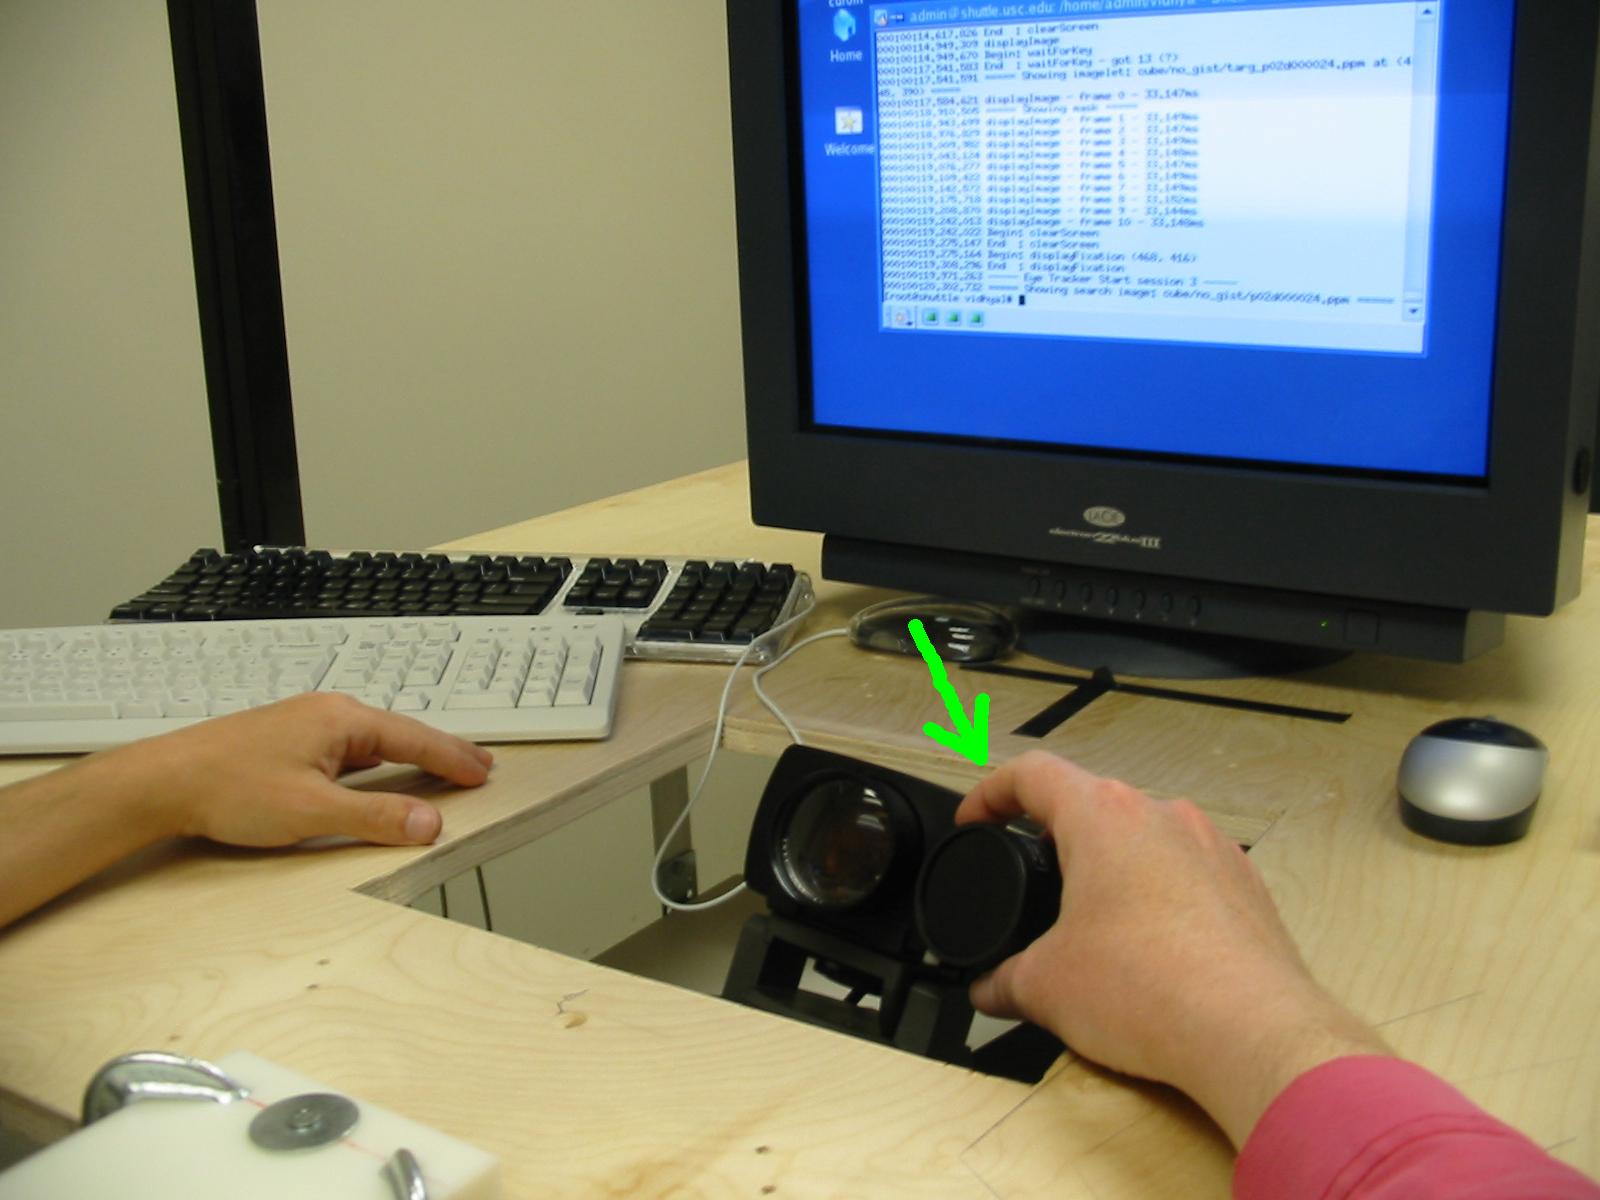
Once you are ready to leave, DO NOT FORGET to disconnect the infrared light source and turn off all three monitors (scene, eye and eye-tracker computer), otherwise these will burn out and you will be in big trouble! Also make sure to turn off all lights. Leave all computers on, though. Put the cap back onto the camera lens to protect it. Failure to handle this expensive and sensitive piece of equipment properly will yield to exclusion from access to the eye-tracker room. |
Copyright © 2003 by the University of Southern California, iLab and Prof. Laurent Itti