|
|
iLab Neuromorphic Vision C++ Toolkit Screenshots
The following are examples of how to use the programs provided with
the iLab Neuromorphic Vision C++ Toolkit. Click on each thumbnail to
see the corresponding full-size image or movie clip. These examples
are refreshed nightly by running 'make demo'. To run the demos
interactively, try the following from your local saliency/ source
directory:
./configure             # if not done previously
make core               # if not done previously
cd screenshots
./build.tcl runner
./rundemo.sh
which will ask you interactively which demo to run and will show
you the results.
For additional explanations about the meaning of the various
command-line options used in these examples, try to run the same
command plus a --help command-line
option, and look for the definitions of the various options used.

|
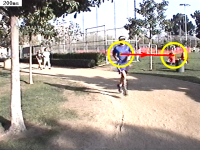
| Goal: |
Attend to salient locations in a static image
|
| Command: |
ezvision --in=frame000000.png -T --out=display -+
|
| Outputs: |
(none; output is sent to the screen)
|
| Notes: |
There are several options here. The --in option says
to take input from the named raster file; we support
several raster file formats, including png and pnm
(ppm/pgm/pbm). The -T option says to generate an output
showing the attention trajectory superimposed on the
input image. The --out option says to send output to
the screen. Finally, the -+ option says to keep processing
even after the input stream is exhausted (ezvision
is a stream-oriented program; without a -+ option,
it would quit once it realized that there was no second
input frame to be processed) -- thus, the program will
keep running until you interrupt it with a Control-C.
|
|
|
| Goal: |
As before, but save the output to disk
|
| Command: |
ezvision --in=frame000000.png -T --out=display --out=mpeg --out=raster --output-frames=0-29@30Hz -+
|
| Outputs: |
T.mpg T[000000-000029].pnm
|
| Notes: |
This is similar to the first demo, but with two differences.
First, we have multiple --out options (this illustrates
the general feature that you can send copies of the
output to an unlimited number of valid destinations).
We send output to the display as before, but we also
save the output to an mpeg file (--out=mpeg) and to
a series of raster files (--out=raster). In each case
the files are named after the particular output type
that we've requested, which in this case is 'T'. Thus
you'll notice that the onscreen window is titled 'T',
the output mpeg file is named 'T.mpg', and the output
raster files are named T000000.pnm, T0000001.pnm, etc.
The second new option here is --output-frames, which
gives a range of output frames and a rate at which
to generate output frames. Thus we've requested 30
frames (number 0-29), coming at 30 frames per second
(30Hz). You can also specify the frame rate as a time
interval using an appropriate suffix (e.g. '0.033333s',
'33.333ms', '33333.0us' would all be roughly equivalent
to '30Hz'). Finally note how the results you obtain
will differ slightly each time you run this command,
as we add small amounts of random neural noise at several
stages in the model. If you want reproducible results,
specify --nouse-random as an additional command-line
option.
|
|
|
| Goal: |
As before, but trigger outputs only when there is a
new shift of attention
|
| Command: |
ezvision --in=frame000000.png -T --out=display --output-frames=0-9@EVENT -+
|
| Outputs: |
(none; output is sent to the screen)
|
| Notes: |
By default, the value of the --output-frames option
is 0-MAX@30Hz, which says to do a (virtually) infinite
number of output frames, the frames coming in a 30Hz
cycle. We have already seen how to restrict the output
frame range; it is also possible to request that the
output be synced to interesting "events", rather than
to a clock. In the case of ezvision, interesting "events"
are shifts of attention; so, in this example, we give
"@EVENT" rather than "@30Hz" and thus we get a new
output frame when and only when there is a new shift
of attention.
|
|
|
| Goal: |
Get the coordinates of the first 5 most salient locations
in an image
|
| Command: |
ezvision --top5 --in=frame000000.png
|
| Outputs: |
top5.txt T000000.pnm ... T000004.pnm
|
| Notes: |
The first 5 shifts of attention towards the 5 most
salient locations in the image are shown in the output
images T000000.pnm ... T000004.pnm. In addition, the
(x,y) coordinates to these locations are saved in the
text file top5.txt, along with other useful information.
Note how --top5 is an option alias, that is, actually
is a shorthand for a series of command-line options.
Have a look at 'ezvision --help', towards the very
bottom of the list, for the definition of --top5 which
will also give you hints on how to work from these
initial options to some slightly different output you
may want.
|
|
|
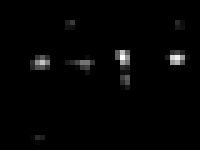
| Goal: |
Just compute the saliency map for an image and save
it to disk
|
| Command: |
ezvision --just-initial-saliency-map --in=frame000000.png
|
| Outputs: |
VCO000000.pfm
|
| Notes: |
Here we just save the initial saliency map (i.e., the
output from the VisualCortex) before any shift of attention,
and exit. A floating-point version of the map will
be saved in our proprietary PFM image format and with
prefix 'VCO', which is good for comparisons across
images as it contains absolute saliency values. See
saliency/matlab/pfmreadmatlab.m for a simple function
to read a PFM image into Matlab, or the simple program
saliency/bin/pfmtopnm. Note that the values in the
VCO map are typically very small, as they are in Amperes
of synaptic current flowing into the integrate-and-fire
neurons of the dynamic saliency map. Typical values
are in the nA range (1.0e-9 Amps). Note how --just-initial-saliency-map
is an option alias, that is, actually is a shorthand
for a series of command-line options. Have a look at
'ezvision --help', towards the very bottom of the list,
for the definition of --just-initial-saliency-map which
will also give you hints on how to work from these
initial options to some slightly different output you
may want.
|
|

|
| Goal: |
Attend to salient locations in a static image, show
attended locations + saliency map + feature maps
|
| Command: |
ezvision -K --in=frame000000.png --out=raster
|
| Outputs: |
T000000.pnm
|
| Notes: |
As usual, you can add --out=display to display the
results in an X window, and they will be refreshed
on each new output frame (though you'll need to add
-+ to tell ezvision to keep going after its input is
exhausted).
|
|

|
| Goal: |
Same as above, but use long-range competition for salience
as in the
IEEE PAMI paper
|
| Command: |
ezvision -K --maxnorm-type=Maxnorm --in=frame000000.png --out=raster -+
|
| Outputs: |
T000000.pnm
|
| Notes: |
If the resulting image is too large to fit on your
screen, try --rescale-output=<width>x<height>
to resize the output images.
|
|

|
| Goal: |
Create a cool 3D output where the original image is
warped onto the saliency map, with height proportional
to saliency
|
| Command: |
ezvision -3 --in=frame000000.png --out=raster:3d --out=display -+
|
| Outputs: |
3d-T000000.pnm, 3d-T000001.pnm, etc.
|
| Notes: |
Note that we have given a prefix, "3d", for the raster
filenames, so that the files are named 3d-T000000.pnm,
etc. instead of just T000000.pnm. Also note that by
default the values in the saliency map are autoscaled
to the 0..255 range for display purposes. To use a
fixed scaling factor instead (which makes more sense
when you want to compare several saliency maps), try
--display-map-factor=50000. Note how each time attention
shifts to the maximum of the saliency map (yellow circle),
that location then is suppressed from the saliency
map by the inhibition-of-return mechanism; also, after
all of the interesting locations have been visited
once, subsequent visits to those locations are considered
"boring" and are marked with a green instead of yellow
circle. Try running this command with an additional
--ior-type=None to disable inhibition-of-return.
|
|
|
| Goal: |
Get a cropped 100x100 imagelet around each attended
location
|
| Command: |
ezvision -T --crop-foa=100x100 --in=frame000000.png --out=display --out=raster:foa -+
|
| Outputs: |
foa-T000000.pnm, foa-T000001.pnm, etc.
|
| Notes: |
For this to be useful, usually you want to also turn
off some of the markings that the program writes by
default onto the output images (yellow circle, time,
yellow square, etc). Try this in conjunction with --nodisplay-time
--nodisplay-traj --nodisplay-patch --nodisplay-foa
to see the difference.
|
|

|
| Goal: |
For the center-surround mechanisms, use center scales
of 1 through 3, center-surround scale differences of
2 through 5, and build the saliency map at scale 3;
this will tweak the system towards being sensitive
to smaller objects than by default.
|
| Command: |
ezvision -K --levelspec=1-3,2-5,3 --in=frame000000.png --out=display --out=raster:levelspec -+
|
| Outputs: |
levelspec-T000000.pnm, levelspec-T000001.pnm, etc.
|
| Notes: |
The default levelspec is 2-4,3-4,4.
|
|
|
| Goal: |
Use twelve orientation channels spanning 0 through
180deg instead of the default 4.
|
| Command: |
ezvision -K --num-orient=12 --in=frame000000.png --out=display --out=raster:12ori -+
|
| Outputs: |
Tframe000000.pnm
|
| Notes: |
A similar option exists for the number of motion direction
channels, --num-directions=XX
|
|
|
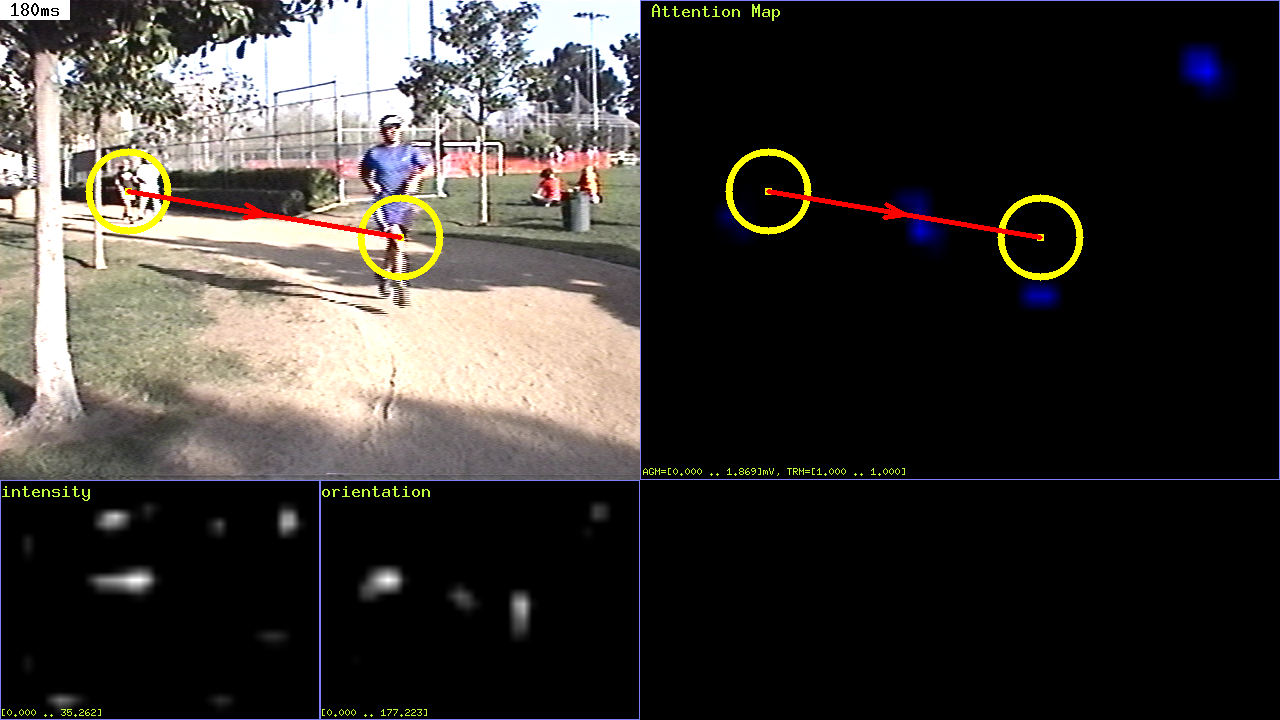
| Goal: |
Use a visual cortex with only intensity and orientation
channels (no color, motion, flicker), and give a weight
of 3.0 to orientation and 1.0 to intensity.
|
| Command: |
ezvision -K --vc-chans=O:3I:1 --in=frame000000.png --out=display --out=raster:vctype -+
|
| Outputs: |
vctype-T000000.pnm, vctype-T000001.pnm, etc.
|
| Notes: |
You can pick any combination of available channels
using this option.
|
|

|
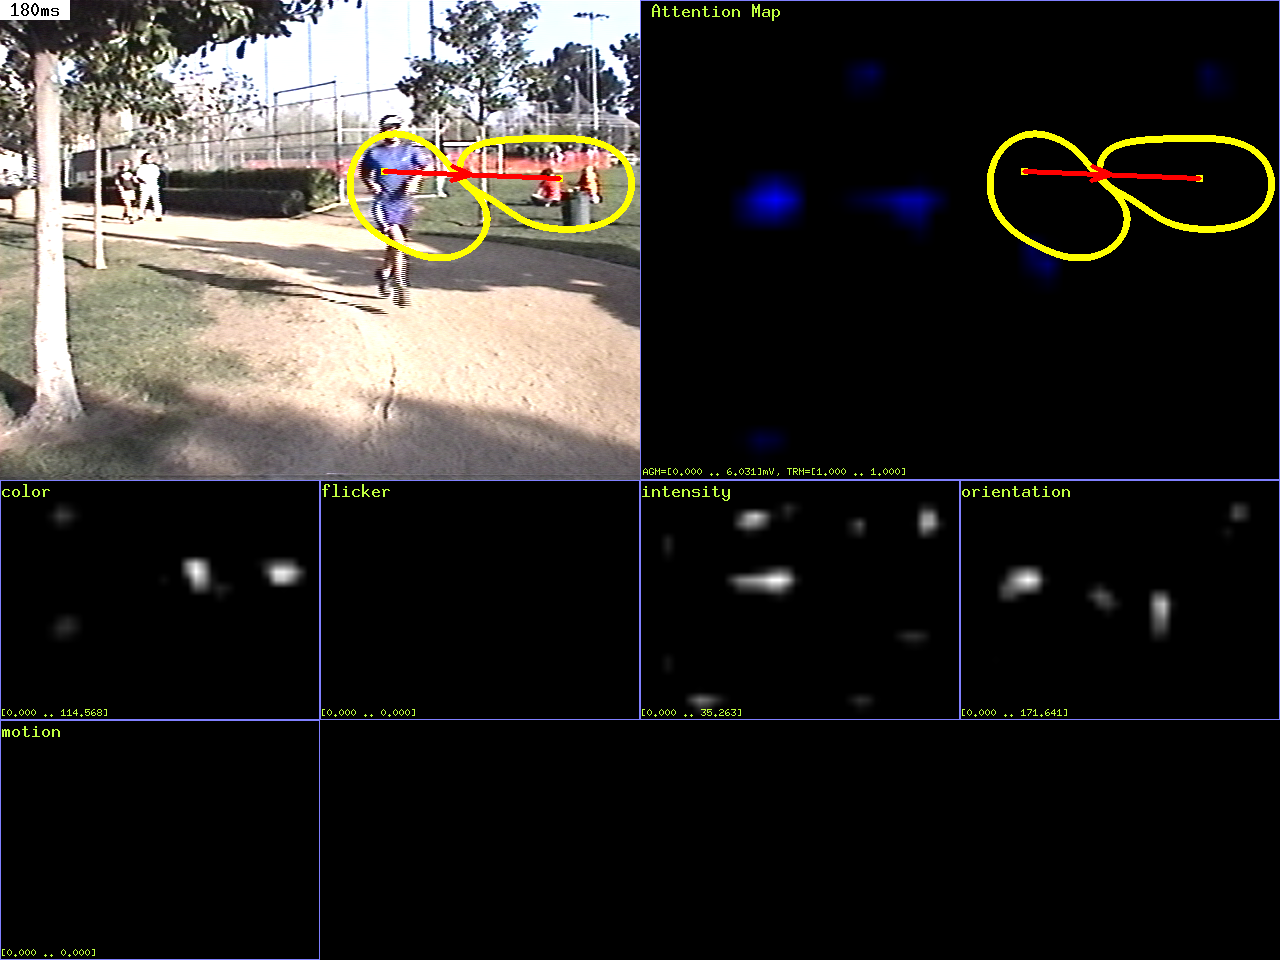
| Goal: |
Estimate the rough shape of the attended object instead
of having a fixed circular focus of attention.
|
| Command: |
ezvision -K --shape-estim-mode=FeatureMap --in=frame000000.png --out=display --out=raster:se -+
|
| Outputs: |
se-T000000.pnm, se-T000001.pnm, etc.
|
| Notes: |
The shape estimator can work in different modes; see
our
BMCV'2002 paper for details. Note also that when
using a circular focus of attention, its radius is
automatically set to max(imageWidth, imageHeight)/12;
you can change that using --foa-radius=XX (this will
affect inhibition-of-return).
|
|
|
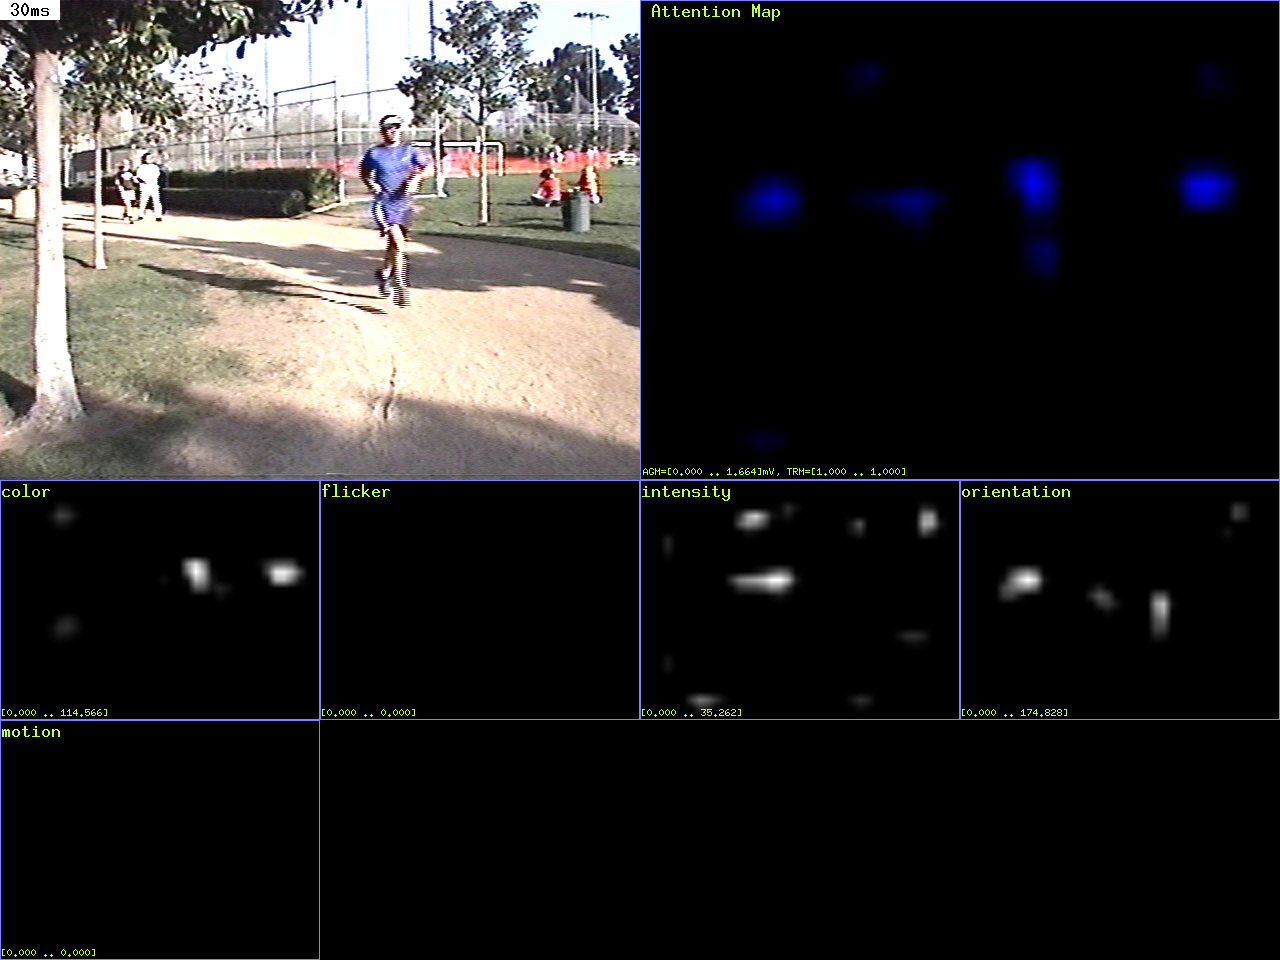
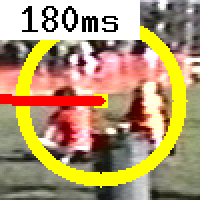
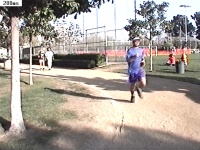
| Goal: |
Process images frame000000.png through frame0000019.png
as a movie with a new frame being input to the Brain
every 30ms of simulated time. Write output frames every
3ms of simulated time. Do not use additive displays,
that is, show at most one attended location on each
frame rather than a cumulative drawing. Do not display
output frames, so that the program can run in batch
mode until all inputs have been processed.
|
| Command: |
ezvision -T --nodisplay-additive --input-frames=@30ms --output-frames=@3ms --in=frame#.png --out=display --out=raster
|
| Outputs: |
T000000.pnm ... T000199.pnm
|
| Notes: |
To use a series of raster files as an input movie,
the files must all have the same name except for a
six-digit frame number. Then, when you pass the filename
to --in, put a '#' in the place where the frame number
should go. Thus --in=frame#.png (short for --in=raster:frame#.png,
but ezvision can infer the 'raster' from the '.png'
extension) will read frame000000.png, frame000001.png.
By default, it will keep reading input files until
it encounters a missing raster file. If you want it
to stop sooner, you can specify a frame range with
the --input-frames option, such as --input-frames=0-19@30ms.
Note that ezvision can also read mpeg movies (using
the ffmpeg/avcodec library) as input, so you could
just as well do --in=movie.mpg. To generate output
movies, you can either generate mpegs directly using
--out=movie.mpg (straightforward, but you have little
control over the movie quality), or you can save a
series of raster files using --out=raster:myprefix
and then encode those mpeg_encode or ppmtompeg.
|
|
|
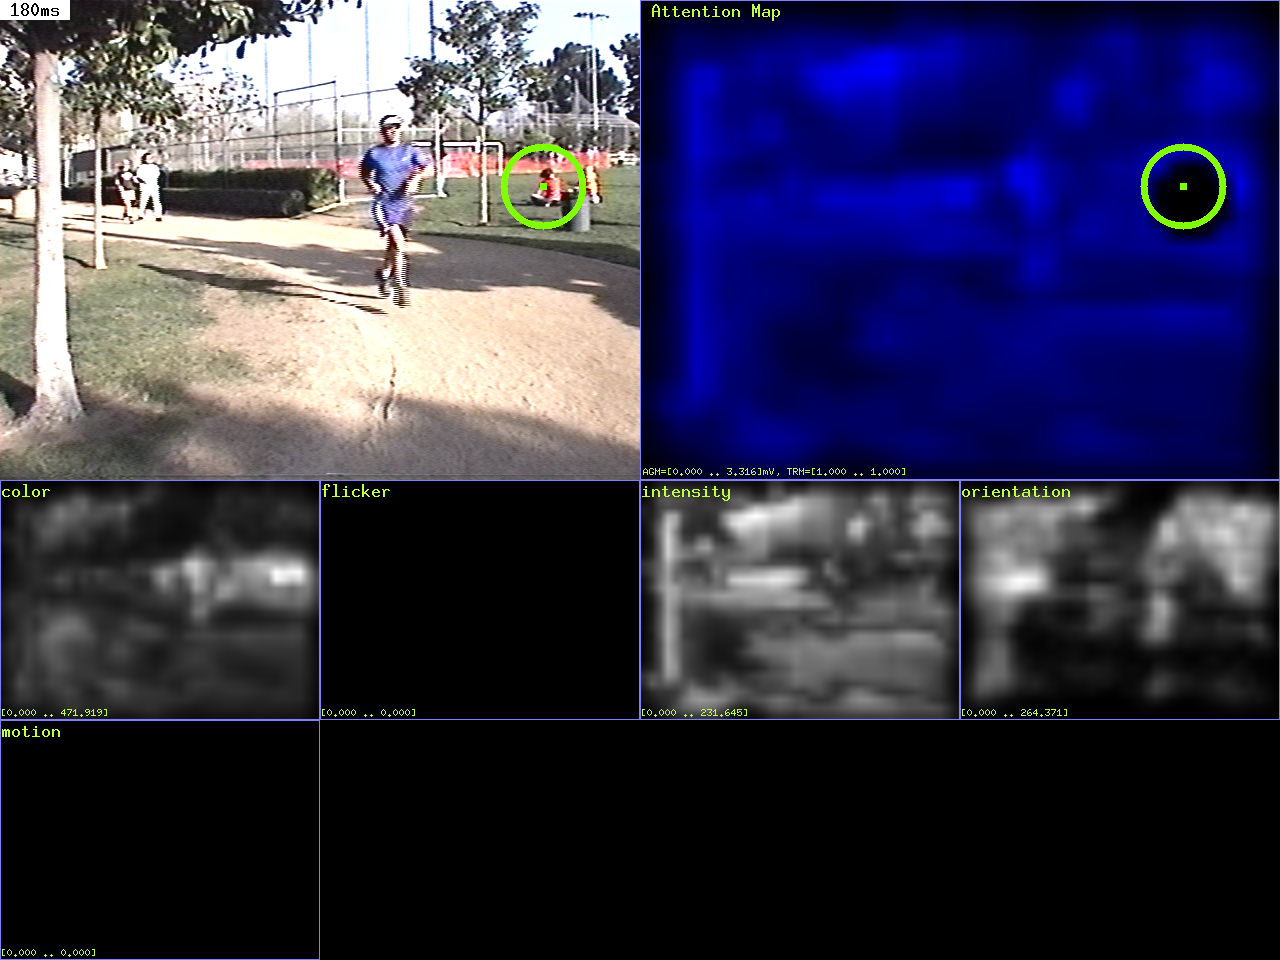
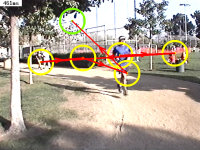
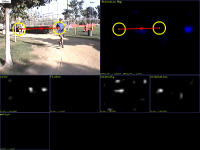
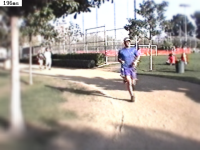
| Goal: |
Same as above, but now simulate eye movements using
a simplistic mass/spring/friction model, and apply
a foveation filter (simulating the decay of resolution
in the retina with eccentricity) to the input frames
around current eye position.
|
| Command: |
ezvision -T --nodisplay-additive --input-frames=@24Hz --output-frames=@240Hz --ehc-type=Simple --hsc-type=None --esc-type=Friction --foveate-input-depth=5 --in=frame#.png --out=display --out=raster
|
| Outputs: |
T000000.pnm ... T000199.pnm
|
| Notes: |
Note how once you have chosen an Eye/Head Controller
using the --ehc-type option, a Head Saccade Controller
using --hsc-type, and an Eye Saccade Controller using
the --esc-type option, if you subsequently use a --help
option you will see new options that are available
for the type of saccade controller which you have selected
(e.g., when a Friction saccade controller is selected,
this creates new options that are specific to that
controller, like --eye-spring-k).
|
|
|
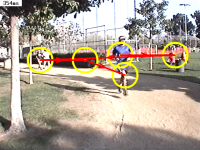
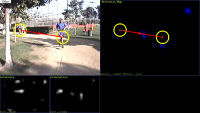
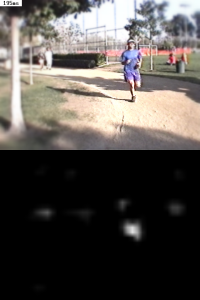
| Goal: |
Same as above, but do not display the yellow circle,
and save both the foveated frames and the saliency
map.
|
| Command: |
ezvision -Y --nodisplay-additive --input-frames=@33Hz --output-frames=@0.005s --ehc-type=Simple --hsc-type=None --esc-type=Friction --foveate-input-depth=5 --nodisplay-foa --display-map-factor=50000 --in=frame#.png --out=display --out=raster
|
| Outputs: |
T000000.pnm ... T000199.pnm
|
| Notes: |
See here
for many more cool movies.
|
|
That should be a good start. Have a look at the various perl
scripts in saliency/bin/ for additional examples of interesting
combinations of command-line options.
|